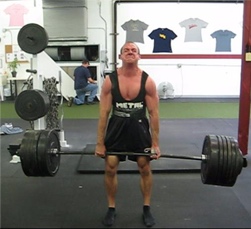
Today's guest post comes from Cressey Sports Performance - Florida Director of Performance, Tim Geromini.
One of the more forgotten muscle groups in the lower extremity is the adductor (groin) complex. Often, there is so much focus on glute activation and hamstrings range of motion that we overlook the adductors. As Eric has written in the past (all the way back in 2004!), depending on the population, adductors can get injured because they're either overactive or weak. In other words, they need to be both "long and strong." Enter an exercise that not only works on eccentrically creating range of motion at the adductors, but concentrically strengthening them, too!
Some of the benefits of Adductor Slides - and the associated coaching cues needed to make the most of your efforts:
1. Eccentric Control: The adductors are mostly known to absorb force in change of direction movements as they experience a ton of eccentric stress when an athlete has to cut or adjust his position. This exercise is not a traditional passive stretch as we are actively stretching the adductors into hip abduction. This should be a slow and controlled purposeful movement, keeping the hips in line with the knees. A cue that works well is “pretend there is a band attaching the Valslides together; now stretch that band.” This cue helps you understand to put force into the ground as you spread your knees as far apart as possible (another helpful cue). You are only going to go as low as your range of motion allows, so work within the range you have. Keeping your feet on the ground is a good starting point. As your range of motion and strength increases, try keeping them off the ground to progress the exercise.
2. Concentric Strength: Now that you have a sufficient stretch of the adductors, it’s time to strengthen them driving up into hip adduction. A helpful cue would be “pull the turf together on the way up.” The adductors play a big and often overlooked role in creating rotational power. At CSP, we often talk about shifting your weight from your back hip to your front hip on a medicine ball exercise, on the mound, and even in the cage. In this instance the role of the adductors is to help internally rotate the femur to create power in the lower half. Without sufficient adductor strength, you’re going to leave a lot of power on the table.
3. Anterior Core Strength: Neither of the two benefits listed above work very well if you can’t maintain a neutral spine while doing them. In other words, don't let the lower back arch. It’s important to note that the adductor muscles originate on the pubis (the bottom portion of the pelvis) and are vital in controlling pelvic stability. If you are doing this exercise on your own, it may be helpful to place an object on your low back and make sure it doesn’t fall off as you go through the movement. Again, think slow on the way down and fast on the way up.
We typically program this exercise for 8 reps either in a warm-up or as a pairing with a rotational med ball exercise. As a regression, you can do one leg at a time while the non-Valslide knee is positioned on the ground/pad.
About the Author
Tim Geromini is the Director of Performance at Cressey Sports Performance - Florida. Prior to joining the CSP team; Tim spent time with the Lowell Spinners (Class A Affiliate of the Boston Red Sox), Nashua Silver Knights (Futures Collegiate Baseball League), Cotuit Kettleers of (Cape Cod Baseball League), and UMass-Lowell Sports Performance. You can contact him at timgero@gmail.com and on Twitter (@timgeromini24).
Sign-up Today for our FREE Newsletter and receive a four-part video series on how to deadlift!
I am very excited to announce that my new product, Functional Stability Training of the Lower Body, is now available. This collaborative effort from Mike Reinold and me follows up on the first module in our Functional Stability Training system, FST for the Core, which was a big hit. Since then, we've had a lot of inquiries about when the follow-up resources in this series would be available - and today's the day.
FST for the Lower Body is a comprehensive program that combines the way Mike approaches rehabilitation projects with how I approach strength and conditioning programs. We talk about a ton of topics that merge our philosophies.
The resource takes a hard look at the lower extremity and how to most effectively optimize function. By addressing alignment, strength, mobility, and dynamic motor control, you can maximize your rehabilitation and training programs to reach optimal performance.
The lower extremities work in conjunction with the core to provide mobility, strength, and power to the entire body. Any deficits throughout the lower body’s kinetic chain can lead to injury, dysfunction, and a decrease in performance. FST for the Lower Body aims to help formulate rehabilitation and training programs designed to optimize how the lower body functions.
The FST for the Lower Body program can be applied to rehabilitation, injury prevention, and performance enhancement programs.
For the rehabilitation specialist, the information will help you restore functional activities faster. For the fitness and performance specialists, the information will help you achieve new progress with your clients to maximize functional and athletic potential. For the fitness enthusiast, the information will help you gain control of your lower body, maximize functional movement, and reduce wear and tear due to faulty movement patterns.
Here is the outline of presentations and lab demonstrations in the program:
Reinold: Training the Hip for FST of the Lower Body
Reinold: Assessing Lower Body Alignment and Movement
Cressey: Preparing the Adductors for Health and Performance
Cressey: Hip Internal Rotation Deficits: Why You Have Them and What to Do About Them
Reinold: Training the Foot and Ankle for FST for the Lower Body
Reinold: Understanding and Implementing Neuromuscular Control Progressions into Your Programs
Reinold: How to Integrate Neuromuscular Control Progressions
Cressey: 15 Things I've Learned About the Deadlift
Cressey: Developing Lower Extremity Strength and Power Outside the Sagittal Plane
This video resource is available as a purely-online product, or you can also order the DVD set, if you'd prefer to have a physical copy for your library. And, this week only, it's on sale for just $79.95, far less than you'd pay for even a half-day fitness or rehabilitation seminar. For more information and to purchase, head here.
Sign-up Today for our FREE Newsletter and receive a four-part video series on how to deadlift!
In this week's mobility exercise of the week, I've got an excellent drill for reducing stiffness in the hip adductors. I came up with this exercise when I realized that I wanted to be able to do more drills to improve hip abduction range-of-motion, but I didn't always want them to be ground-based. And, just doing lateral lunge variations all the time can get a little boring for athletes. Enter table adductor dips.
I especially like to use this with our throwers because it actually parallels some of the hip angles we see with the pitching delivery, so it makes for a great warm-up and off-season maintenance/improvement exercise. I also like it for them because they can do it out on the field without having to roll around in the grass (which would be the case with a lot of other adductor mobility drills).
In terms of coaching cues, it's important to keep the weight on the support leg's heel and sit back "into" the hip. The majority of the weight should be on the down leg, with minimal pressure put on the leg that's up on the table.
As you go through the exercise, brace the core to ensure that the movement comes through the hips (flexion and abduction) at the bottom position, rather than just allowing the lower back to round. Having the arms out in front as I do in the video above can help as a counterbalance to prevent your butt from tucking under. If you're super stiff, you may want to consider holding a ten-pound plate out at arm's length as an additional counterbalance.
At the top position, be sure to extend the hips all the way to stand tall between each rep. I usually cue folks to activate the glute on the support leg to finish each rep. This will also help guarantee that you're stretching the adductors in both flexion and a neutral position.
We'll typically do sets of eight reps on each side during the warm-up period. This can, however, be held for a longer duration as a static stretch at the end of a training session.
Here's this week's list of recommended strength and conditioning reading:
Groin Strain? Get Manual Therapy - I received an email inquiry this week about training around a groin strain, and it reminded me of this old post of mine.
America's Scariest Fitness Trends - This was a story by Adam Campbell for Yahoo Sports' The Postgame, and I provided a few quotes.
Quantifying the Farmer's Walk- I thought this was an outstanding piece from Shon Grosse, a good friend of mine who is an outstanding physical therapist in Pennsylvania.
Sign-up Today for our FREE Newsletter and receive a four-part video series on how to deadlift!
If you've had a groin strain (or adductor strain, for the anatomy geeks like me in the crowd) - or would like to prevent one in the first place - read on.
Those of you who check out this website regularly probably already know that I'm a huge advocate of good manual therapy - especially disciplines like Graston and Active Release. One area where we constantly see athletes really "gritty" is the hip adductors (groin muscles) - and it's one reason why we see so many groin strains in the general population. Note that treatments DON'T have to be this aggressive to yield favorable outcomes; it's just an extreme example of someone with a pale skin tone that makes it even more prominent:
Soccer and hockey players really overuse the adductors during the kicking motion and skating stride, respectively. And, even outside athletic populations, you'll see a lot of people who don't activate the gluteus maximum well as a hip extension - so you have the adductor magnus taking over to help out with this important task. The only problem is that the adductor magnus internally rotates and adducts the hip, whereas the glute max externally rotates and abducts the hip. Movements get altered, one muscle gets overworked and all fibrotic, and the next thing you know you've got a nasty "tweak" just south of the frank and beans (or female equivalent).
Really, that's not the issue, though. Nobody is denying that groin strains occur - but there are different treatment approaches to dealing with this issue on the rehabilitation side of things. Some professionals use manual therapy during their treatments, while others don't. Can you guess which school of thought gets my backing?
Well, it turns out that the "include manual therapy" side of the argument gets the backing of Weir et al in light of some new research they just published. These researchers found that athletes with groin strains returned to sports 4.5 weeks sooner when they received manual therapy plus stretching and a return to running program as compared to an exercise therapy and return to running program only. It took the average time lost down from 17.3 weeks to 12.8 weeks in those with good long-term outcomes! For a bit more information on the manual therapy discipline utilized in this particular study, check out this abstract.
Need a quick tutorial on how to come back from a groin strain?
1. Find a good physical therapist who does manual therapy.
2. Listen to and do everything he/she says.
3. If anything hurts in the gym, don't do it. In most cases, deadlifting variations are okay, but single-leg work will really exacerbate the pain. Squatting is usually a problem at first, and then gets better over time. It really depends on which of the adductors you strained.
4. When you are cleared for return to full function, keep hammering on glute activation and hip mobility as outlined in Assess & Correct.
5. Make sure you're continuing to foam roll the area and getting the occasional treatment on them with that same manual therapy you had during your rehabilitation. Here's a great self myofascial release option with the foam roller:
Sign-up Today for our FREE Baseball Newsletter and Receive and Receive a Copy of the Exact Stretches used by Cressey Performance Pitchers after they Throw!