We're long overdue for a new installment of my "Exercise of the Week" series, so here's a look at one of my favorite warm-up/cool-down drills. With TRX Deep Squat Prying, you get a great lat inhibition exercise that has the added benefit of training some hip and ankle mobility, plus core stability. In other words, it delivers some fantastic bang for your training buck. Check it out!
One of the first things some individuals notice when they come to observe at Cressey Sports Performance is that we often pair “big bang” strength and power movements with lower intensity drills. This is also a common programming theme many of those who have completed my High Performance Handbook program have noticed.
As an example, we might pair a prone trap raise with a deadlift…
…or a hip mobility drill with a bench press.
We call these low-intensity inclusions “fillers.” Truthfully, though, I’m not sure that this name does them justice, as “filler” seems to imply a lack of importance. In reality, I think these drills have a profound impact on improving each client/athlete’s session. Here are five reasons why.
1. Fillers slow advanced athletes down on power and strength work.
Optimal training for strength and power mandates that athletes take ample time between sets to recharge. Unfortunately, a lot of athletes have a tendency to rush through this type of work because it doesn't create the same kind of acute fatigue that you'd get from a set of higher-rep work. Muscular fatigue is a lot easier to perceive than neural fatigue. In other words, you'll want to rest more after a set of six squats than you would after a set of six heidens, even if you were attempting to put maximal force into the ground on each rep with both.
By pairing the strength or power exercise with something a little more mellow, we “force” athletes to take adequate rest and get quality work in on subsequent sets of the “meat and potatoes.”
2. Fillers provide extra opportunities to work on basic movement competencies and corrective exercises.
If something is important, do it every day. For some people, this might be hip mobility work. For others, it might be some rotator cuff work. You might as well do it when you’d otherwise be standing around resting.
3. Fillers improve training economy – and may even allow you to shorten the warm-ups a bit.
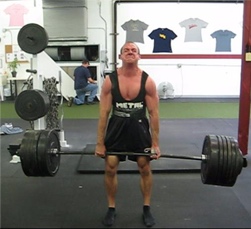
This point is best illustrated with an example. Let’s say that I would normally do an 8-10 exercise dynamic flexibility warm-up before my lifting-specific work. Then, I’m warming up to a 600-pound deadlift like this:
On that warm-up progression, I have eight “between-set” breaks to get in a little extra work. Sure, I’m loading on plates, but that doesn’t mean I can’t bang out a few quick reps of ankle mobility or scapular control work. This can be pretty clutch – especially once I’m at the heavier warm-up sets that require a bit more rest – as it can actually allow me to shorten my earlier general warm-up period a bit.
When it comes to training economy, everyone wants to talk about exercise selection (picking multi-joint exercises) and finding ways to increase training density (more volume in a given amount of time). However, don’t forget that movement quality work is still “work.”
4. Fillers help to prevent “backups” in the training facility.
This is a double-edged sword. If you’re doing some hip mobility work between sets in a busy commercial gym, if you aren’t careful, it probably will increase your likelihood of someone stealing your squat rack.
However, in the collegiate, professional, and private sectors, incorporating fillers can be invaluable in preventing log jams where many athletes are trying to use the same piece of equipment at the same time. If you’ve got three athletes sharing the same trap bar, fillers can help things flow a bit smoother – particularly because it keeps less-than-attentive athletes from screwing around between sets.
5. Fillers may give deconditioned clients active recovery between sets to make the most of their time with you.
For some clients, the warm-up is the workout. In other words, they may be so deconditioned that even a set of the Spiderman with hip lift and overhead reach will get their heart rate up. If you paired this mobility drill with an inverted row, it might be a perfect fit for their fitness level. Conversely, if you paired that inverted row with a Bulgarian split squat, it might crush them. In this case, the filler is hardly a filler!
Fillers might have a connotation of “unimportant,” but that couldn’t be further from the truth. Try incorporating them in your programs to get higher quality work, improve training economy, and bring up weak links.
Sign-up Today for our FREE Newsletter and receive a four-part video series on how to deadlift!
Today's guest post comes from Cressey Sports Performance colleague, Dr. James Spencer. Enjoy! -EC
Epidemiological research suggests that the incidence of foot problems, specifically issues with the first metatarsalphalangeal joint (MTP) is common (1). These common big toe and foot problems are exposed in the systematic approach of the Selective Functional Movement Assessment (SFMA) and Functional Movement Screen (FMS). The big toe condition I would like to highlight is Functional Hallux Limitus (FHL). FHL is a separate distinct diagnosis from Structural Hallux Limitus (SHL). FHL is characterized by a lack of dorsiflexion of the first MTP joint during the gait cycle only (2).
The one problem that I typically see with this condition is how infrequently diagnosed it is. The reason for this may be that patients may not have experienced pain in their toe or a drastic compensation pattern. Additional research also reported that the presence in foot symptoms does not necessarily correlate with the presence of dysfunction and that patients may be experiencing dysfunction without having any accompanying symptoms (1).
The big toe is a very underestimated player in the Joint by Joint Theory. Popularized by Gray Cook and Mike Boyle, the Joint by Joint approach is alternating series of stable segments on mobile joints, where (generally):
You could see how an alteration in this Joint by Joint approach could affect the mechanics and joints up and down the kinetic chain. In this article I would like to explore FHL and its interplay with Regional Interdependence, which refers to the concept that seemingly unrelated impairments in a remote anatomical region may contribute to, or be associated with, the patient’s primary complaint (3). Therefore, you could see how a lack of big toe mobility can lead to a wide spread of conditions locally, at the joint, and systemically, up the kinetic chain and beyond. For example, some associated signs and conditions may include overpronation, ankle mobility restrictions, toe out posture, posterior tibialis tendinosis, achilles tendinosis, plantar fasciitis and patellar tendinosis, just to name a few. Regional interdependence displays the amazing anatomical and biomechanical interconnection throughout the human body.
Functional Anatomy
The first metatarsal is the shortest and thickest of the metatarsals. Two sesamoid bones, encased in the tendons of the intrinsic muscles, lie beneath the head of the first metatarsal. Suggested sesamoid function for the first metatarsal allows the big toe to plantar flex during extension of the hallux, enhance the load-bearing capacity of the first metatarsal, and to improve the mechanical leverage for the attached intrinsic muscles (4). Depending on the literature you read, the first ray is designed for 50-70 degrees of big toe extension during static evaluation. However, I would argue that 45 degrees of big toe extension is actually adequate during the gait cycle. This is supported with the work of Nawoczenski in the Journal of Bone and Joint Surgery. I could not find any published research on if these values were different during the running cycle. If you look at Thomas Myers’ work with the Superficial Back Line (SBL), you can see how the lack of big toe extension could wreak havoc on the entire kinetic chain via regional interdependence.
Originating from the plantar aspect of the calcaneus, the plantar fascia is more than just a passive band of connective tissue. As the plantar fascia travels distally towards the toes, it separates into five slips of fascia. Each plantar fascia slip inserts plantarly onto each of the five digits. As the foot transitions from midstance into push-off, the toes begin to dorsiflex and the plantar fascia is activated. This activation of the plantar fascia upon hallux dorsiflexion is referred to as the “windlass mechanism” and is the second step in preparing the foot for propulsion.
Since power during propulsion is dependent upon the foot’s ability to become a rigid lever, ensuring proper hallux dorsiflexion during the gait is key to achieving full foot supination (5). Considering that during gait, the entire body is advancing past this single joint, the ability to dorsiflex, and subsequently raise the heel during single support phase while simultaneously supporting against the developing forces for forward motion is essential for normal, efficient gait. If this mechanism fails, sagittal plane compensation will be forced to occur (6). When the first MTP joint motion is disrupted enough to prevent stabilization of the foot structure during maximal hallux dorsiflexion, through the effect of the windlass mechanism, then normal foot stabilization during propulsion is disrupted, and becomes clinically significant (7).
Aside from the specific biomechanics that are addressed in the lower quarter, looking at mobility loss more globally will always relate to an anterior weight shift. Repetitive function with an anterior weight shift yields facilitation and inhibition in a very predictable pattern.
Common Compensations with FHL
Compensations will occur due to injuries, faulty mechanics and previous experiences. We have to take a step back and realize our CNS (Central Nervous System) is a high-speed train moving forward with “Life;” therefore, compensations will inevitably occur throughout our lives. We could blame previous injuries, posture, ergonomics, it really doesn’t matter what we point the finger at, but our CNS will continue to move forward whether the movement is mechanically advantageous to us or not. The key is not allowing compensatory patterns to become engraved as movement patterns. The CNS loves stimulation and constant feedback for neuroplasticity.
This video displays amazing neurological changes and shows how habits, movement patterns and previous experiences influence our neurological systems. Plus, you have to appreciate the MacGyver Mullet comment! I also want this to be an eye opener for people to see how long it can take to learn new motor skills and how easily it is to revert right back in to an old pattern.
Some of the most common compensations that I see consist of limited proprioception in the midfoot, limited ankle mobility, and limited hip extension. Limited proprioception in the midfoot can lead to plantar fascitis or medial arch stress. Limited ankle mobility - typically dorsiflexion - is another common imbalance that must be assessed in a client seeking power at propulsion. Normal gait requires at least 10 degrees of ankle dorsiflexion with maximum ankle dorsiflexion occurring during late midstance. Limited ankle mobility can lead to a myriad of compensations including midfoot pronation, knee hyperextension and an early heel rise during gait (5). Limited hip extension can lead to abduction compensation and produce the classic overpronated foot type and abducted stance position. The stride length shortens and reduces hip extension and glute activation. As Charlie Weingroff has noted, this is caused when the correct pathway of motion is blocked by the lack of 1st ray dorsiflexion, the person will produce an abducted foot in order to roll off the inside of the toe in order to allow for hip extension (8). I find that this compensation is most often related to the development of Hallux Valgus and bunion formation.
Corrective Strategies
Here's one of my favorite simple drills to use (in combination with manual therapy) with folks with FHL:
I also like to progress individuals to 2x4 walks to integrate this pattern in balance training:
Final Thoughts
Your big toe is essential for proper balance, running, walking and many other athletic activities or exercises. As the foundation to human movement, optimal power during propulsion is dependent upon proper foot posture and muscle activation patterns. With every step, the human foot must convert from a mobile adaptor at midstance to a rigid lever for propulsion. Integrating foot-specific exercises sets the foundation for sufficient foot strength and forefoot re-supination. The quicker the foot can become a rigid lever, the greater the power that is unleashed during propulsion (5). I believe that there is inadequate diagnostic criteria for clinicians to properly diagnose FHL. Since FHL is diagnosed during closed kinetic chain, we should look in to a more definitive way to diagnose this functional condition. Moreover, a dynamic gait analysis that shows timing and pressure differences in the foot may be a good source of objective measurement for future diagnostic criteria.
My goal of this article is to raise awareness of how important the big toe mobility and stability is for every day life and function. Please don’t take the movement algorithm of walking for granted because it is one of the most complex movements the human body performs. Let this final picture be a reminder to never chase pain when evaluating or treating someone and keep the thought of regional interdependence in mind.
Note: references for this article will be posted as the first comment below.
About the Author
Based in South Florida, Dr. James Spencer is a Sports Performance Chiropractor, Certified Athletic Trainer, and Fellow of the International Academy of Medical Acupuncture. He has formal training in Active Release Techniques, Graston Technique, Kinetacore Functional Dry Needling, SpiderTech Kinesiology Tape, RockTape Fascial Movement Taping, Postural Restoration Institute, Y-Balance Test, FMS, SFMA, Mike Boyle’s Certified Functional Strength Coach and the Onnit Academy of Unconventional Training. You can find Dr. Spencer on Facebook, Instagram and at www.DrJamesSpencer.com.
Sign-up Today for our FREE Newsletter and receive a four-part video series on how to deadlift!
With my last post, I kicked off the "Best of 2014" series with my top articles of the year. Today, we'll highlight the top five videos of the year. These videos only include instructional videos, not quick exercise demonstrations.
1. Thoracic Mobility and Back Squatting - Upper back positioning is a key factor in squat technique, but not everyone starts in the same position. Check out the video to learn more:
2. Serratus Wall Slide Variations - Serratus anterior is an incredibly important muscle for shoulder health and function. Here are two exercises we use in our serratus anterior activation progression.
3. Do You Really Have Poor Ankle Mobility? - It's been my experience that ankle flexibility restrictions are really "overdiagnosed," and in reality, people just don't know how to shut off their plantarflexors (calves) as part of a heavily extended posture. I elaborate in this video:
4.Are You Packing the Shoulder Correctly? - It's important to be able to pack the shoulder, but in many cases, folks don't know exactly what is or should be going on functionally. This webinar should clarify.
5. Limited Shoulder Flexion in Pitchers - We often hear that shoulder dysfunction relates to elbow pain in throwers, but very rarely do we hear the "why" behind this link. In this video, I elaborate:
I'll be back soon with the top guest posts of 2014!
Sign-up Today for our FREE Newsletter and receive a four-part video series on how to deadlift!
I received the following question the other day, and thought it'd make for a good Q&A to post here. Enjoy!
Q: I was hoping to get your thoughts on whether or not I should incorporate Olympic lifting shoes with my training. I tried them out the other day, and they helped me to squat pretty deep, which is pretty significant, as I've always struggled to even make it to parallel without the "butt-wink" happening. Would you recommend I make them a part of my training so that I can get the benefits of squatting?
A: This is a great question; unfortunately, it's not a simple answer - so bear with me!
First and foremost, if you're an Olympic lifter, by all means, wear Olympic lifting shoes. It's how you compete and specificity is important. And, as we know, competing at the highest level of athletics always suggests an element of assuming a greater risk to achieve a greater reward - at least as compared to "simply" training.
If, however, you're an athlete in a different sport - or just a general fitness enthusiast - I don't think they're necessary. And, they may even be problematic if long-term improvements to your movement quality and health are goals of yours. I'll explain - but first, we need to understand the two primary reasons folks wear them.
First, there is the firmness factor. O-lifting shoes have a very solid heel without "give;" this makes them a better platform against which to produce force, as compared to normal sneakers. This firmness isn't exclusive to O-lifting shoes; you'll also find it in some minimalist shoes, Chuck Taylors, or no shoes at all. Most powerlifters know this, and it's why they generally lift in "firm" footwear that allows better heel contact with the floor. This leads us to point #2...
There is a prominent heel-lift in these shoes. I've seen heel lifts ranging from everything from a 0.5 to 1.25 inches. In the sneaker world, however, everything is generally related in terms of heel-toe drop, or % grade. For a long time, the standard running shoe was a 12mm heel-toe drop from 24mm (heel) to 12mm (toe), which creates a 8% grade. The tricky part about interpreting what this means in the context of Olympic lifting shoes is that I can't say that I've ever seen anyone list the height of the toe, so we don't really know the grade. The 0.5 inch lifts are surely pretty moderate, as 0.5 inches equates to 12.7mm, whereas the 1.25 inch ones would be 31.75mm, which is actually in excess of what you see with the much maligned Nike Shox (25mm).
This obviously leads to the question, why isn't a firm shoe alone sufficient? What's the rationale for the massive heel lift? Effectively, it's a crutch that helps lifters with mobility or stability deficits reach squat depth easier.
To squat deep, you need to be proficient on a number of fronts, the foremost of which are:
1. You must have sufficient dorsiflexion range of motion (knee over toe ankle mobility).
2. You have to have sufficient hip internal rotation (can be limited by muscular, capsular, alignment, or bony issues).
3. You have to have sufficient hip flexion (can be limited by muscular, capsular, alignment, or bony issues; this typically isn't much of a problem).
4. You have to have adequate knee flexion (this is rarely an issue; you'd need to have brutally short quads to have an issue here).
5. You need to have adequate core control - specifically anterior core control - to be able to appropriately position the pelvis and lumbar spine. This is especially true if we're talking about an overhead squat, as it's harder to resist extension with the arms overhead.
If you lack ankle mobility, you either turn the feet out, go up on your toes, or rely on the crutch that a heel lift provides. By elevating the heel, rather than going from neutral to dorsiflexion, you are going from plantarflexed to neutral. Effectively, it brings you a few yards behind the starting line so that you don't false start, if that makes sense (if it doesn't, don't worry; I'll have more on this in the video below).
If you lack hip internal rotation, you turn the toes out so that you're internally rotating from an externally rotated position to neutral, as opposed to going from neutral to an internally rotated position.
I think that we all agree that these positional changes allow you to make up for a lack of mobility - but that doesn't mean they're necessary a good thing, as you're effectively loading an aberrant movement pattern. As Gray Cook has taught us, if you continue to pile fitness (strength) on top of dysfunction, bad things happen.
As you may have noticed, I've left out proficiency #5 from above: you have to have adequate anterior core control. And, it's because I've saved the best for last; this is a HUGE issue.
I'm going to let the cat out of the bag and say that I think we've "over-diagnosed" ankle mobility restrictions. Most people automatically assume that if they have a poor squat pattern, it's because they have an ankle mobility problem. I'd estimate that in 90% of cases of people who think their ankle mobility stinks based on a bad squat pattern, they actually test pretty well when you look specifically at the joint, as opposed to relying solely on a gross movement pattern. Why? There is a tremendous interaction between mobility and stability. In this video, I elaborate:
As further proof of the fact that different athletes will demonstrate their patterns of insufficient control of extension differently, check out these four posture pictures of athletes who had poor squat patterns. In the first, you'll find a pretty "classic" extension posture that's distributed over multiple joints. Note the anterior pelvic tilt and lordosis, plus the relatively neutral knee and ankle positions.
In the second, note the plantarflexed ankles; this athlete has shifted his "extension compensation" further down. Do you think he'll have much of a squat pattern with that resting presentation? He might have perfectly good ankle mobility, but he's completely unable to shut off his plantarflexors (calves); that's where he's "finding" his stability.
In this third example, the athlete has dumped forward at the pelvis and lumbar spine to create what could be considered a swayback posture - even though his ankles actually look pretty neutral.
Finally, we'll look more full-body for our fourth example. Obviously, this athlete is in a heavily extended pattern through the pelvis and lumbar spine, but note also the positioning of the arms; his lats are so "on" that he carries his elbow considerably behind his humeral head, and the scapula dives into anterior tilt. There's a forward head posture, and while you can't appreciate it well from this angle, this athlete also had a ton of "tone" in his scalenes, sternocleidomastoid, and subclavius. He found his stability further up the chain.
Every single one of these out-of-whack presentations is a way for the athletes to shift their faulty movement patterns around to "get by." Athletes are tremendous compensators - but they all do it differently. I think we can all agree that these are issues that should be addressed, right? Well, they were - and the athletes felt a lot better from the training interventions.
How does this relate back to Olympic lifting shoes, though? Well, every single one of these athletes could demonstrate a perfect squat pattern if I put them in a pair of shoes with this dramatic a heel lift. It's like giving the most uncoordinated kid in the neighborhood training wheels...for good. At some point, you've got to lose the training wheels and learn to ride the bike. And, at some point you need to stop covering up your poor movement patterns and work to address them - rather than just loading them - if you want to stay healthy.
To me, squatting with a pronounced heel lift is really no different than squatting through a "butt-wink;" they are both compensations to allow a lifter to maintain the position of the center of mass within the base of support in the face of a gross extension pattern. Both fundamentally alter the ideal squat pattern, though. Conversely, if you use goblet squat or TRX overhead squats to train the pattern with a subtle counterbalance, though, you're keeping the movement intact, but reducing the challenge to the lifter.
In folks who have really poor squat patterns, I'd much rather see them work to improve the squat pattern for a bit, as opposed to considerable loading of the classic back squat. While they're working on improving the pattern (through these exercises and other breathing and core stabilization drills), they can train the heck out of the lower body with deadlift variations, single-leg drills, barbell supine bridges/hip thrusts, sled pushing/dragging, and a host of other exercises. Once their squat pattern has improved, progressing to a front squat is a great first step, with the back squat coming a bit later on.
With all that said, before I get any hate emails, let me be abundantly clear: if you move well (i.e., have a good squat pattern to below parallel in bare feet), then by all means, feel free to use Olympic lifting shoes for your squatting and Olympic lifting, if it tickles your fancy. After all, it's only 5-10% of your training volume, most likely. Just make sure to a) only wear them for these exercises, b) maintain the underlying "heel-less" squat pattern, and c) pick the shoes with the smaller heel lift (0.5" instead of 1.25"). You might also consider wearing more minimalist footwear for the rest of your training sessions to "cancel" the O-lifting shoes out. And, again, if you're a competitive Olympic lifter, please feel free to rock whatever you want - and crush big weights doing so.
If, however, you're an athlete in another sport who uses squatting and Olympic lifting as part of your training, I don't think it's a useful addition. And, it's certainly not an appropriate initiative if you are just someone who is looking for a way to work around your poor mobility. Ignoring a fundamental movement flaw - and certainly loading it - will always come back to bite you in the butt.
Sign-up Today for our FREE Newsletter and receive a four-part video series on how to deadlift!
Today's guest post comes from CP coach, Greg Robins.
This week, my girlfriend is off competing for the Miss International title. I am really proud of her, as she is doing so to raise awareness for her charity. She asked me how she could cancel out some of the negative repercussions that come along with wearing heels for seven days straight. It got me thinking, and I decided to take my advice to her and make it into a post for the readers out there who regularly wear high heels - or train females who do so.
It almost goes without saying, but wearing footwear that includes an excessive heel lift (i.e. high heels), greatly alters the alignment of your entire body. When we are misaligned, certain areas of the body will be asked to do more than they should, while other areas, in turn, are unable to fulfill their duties. We recognize this problem and its ill effects with people who function day to day with poor posture and movement habits. When we choose to wear this type of footwear, we are forcing ourselves into a poor position, regardless of where we were prior. To make matters worse, most of us are not in a particularly great position barefoot. The addition of heel lifts, as high as 2 - 4 inches, certainly does not help.
That being said, high heels are a fashion statement, and sometime ladies just want to look glamorous. I certainly am not one to advocate against wearing something that makes you feel like a million bucks. However, if you don't want to feel like the polar opposite of that the next day, try applying these five tips!
1. Do more self massage.
I recommend keeping a golf ball, lacrosse ball, and (if possible) a foam roller or piece of PVC pipe on hand. As we touched on above, wearing high heels will cause a few muscle groups to work overtime. The idea with all of our tips is to "undo" what you have "done." With that in mind, we need to start with a concerted effort to take down the tone down of these overactive muscles.
Use a golf ball to massage the bottom of your feet. This can be done by placing the ball underneath your foot while standing. Apply a generous amount of pressure while rolling the ball in various patterns along the underside of the foot.
Like wise, you can do a similar thing on the muscles of your calves with either the golf or lacrosse ball. In a seated position, place the ball under your calf and apply pressure while rolling the ball around the back side of your lower leg.
Another great spot on which to use the ball is the front side of your upper leg. Attack the hip flexors by using the lacrosse ball and/or foam roller. In a prone (face down) position, use the implements to massage the quadriceps (thigh) as well as the high, anterior (front) of the hips. While I would make these two spots the priority, you would be well advised to work on the outer thigh, and inner thighs as well. Check out our foam rolling progression in the video below. Pay extra attention to the portion targeting the lower extremities.
2. Facilitate the inhibited muscle groups.
Once you have finished with the self massage techniques described above, you will want to "re-ignite" the areas that were inhibited by the mal-positioning of a high heel lift. I like people to start from the core, and work their way out. There are three easy to use activation exercises to get you going. First, you can use a low level breathing exercise. Breathing exercises will help facilitate the diaphragm, and the external / internal obliques. By doing so, we can help "turn on" the mid-section correctly, get you away from an extended bias, and further bring down the tone of your body. A great option is the the deep squat breathing with lat stretch. Check out the video below.
Next, we can facilitate the mid section a little more aggressively by adding some movement of the limbs while controlling the core. Dead bugs are a viable option here. Check out this video:
Lastly, some easy glute activation is in order. The glutes function in all three planes of motion. Therefore, it is important that we facilitate their function correctly. For lesser trained individuals I would recommend hammering the sagittal plane first and foremost. Supine bridge variations are the best place to start. From there, we can work into a side lying clam variation. Lastly, for the more prepared individuals an exercise such as the bowler squat is a nice way to activate the glutes in all three planes. Check out the videos and pictures below.
3. Stress foot/toe and ankle function.
When wearing heels, the most obviously altered joints are the toes/foot and the ankles. It is important that we address them appropriately. The toes will be constricted by the narrow toe in most of these shoes. Because of this they will no longer function normally during gait. Additionally, the ankles will be placed into a position of plantarflexion permanently. With this in mind, there are a few easy exercises that should be done in order to restore proper function of the foot and ankle. The first would be some low level mobility drills for the ankle, stressing dorsiflexion. Knee break ankle mobs are terrific in this scenario.
Furthermore, some ankle "alphabets" are also a great way to restore function to both the ankle and the foot.
Lastly, I would recommend doing toe pulls as well to wake up the feet, and toes. Check out the video below from Hitting Performance Labs showing us the toe pull exercise made famous by the folks at Z Health.
4. Re-groove a posterior weight shift.
The heel lift causes us to shift our center of mass forward. This can be a big problem, namely for all the reasons we talked about in the opening of this article. In order to combat this, we need to re-groove a posterior weight shift. Basically, the idea is that we need to re-teach our body what right feels like. Eric did a great post on the effectiveness of the left-stance toe touch, you can read it here. For now, make sure that you implement this exercise as often as possible, especially when you find yourself wearing heels!
5. Take a break whenever you can.
Finally, you can offset the problems associated with wearing heels by simply taking them off whenever possible. If you have 10-15 minutes where you can catch a break, do so! If you really want to make progress, use that time to do some of the drills above.
If you regularly find yourself in heels, I hope this article helps you out. Additionally, if you know someone who wears heels on a regular basis (I know you do!), then please share this with them!
Sign-up Today for our FREE Newsletter and receive a four-part video series on how to deadlift!
It goes without saying that ankle mobility deficits are becoming more and more common these days. It may be because:
1. Modern footwear is atrocious, with elevated heels, high tops, and rigid sides
2. We carry our center of mass too far forward thanks to postural distortions that encompass anterior pelvic tilt and forward head posture (among other ramifications).
3. We never utilize extensive dorsiflexion in our daily lives, whether it's in a full squat or high-speed running.
Of course, it's usually a combination of all these factors. And, while we can try out minimalist sneakers to deal with problem #1 and tinker with our exercise program to work on problem #2, problem #3 is a bit more cumbersome, as many of these folks have anterior knee pain that is exacerbated with squatting, running, and ankle mobility exercises where the knee is driven in front of the toes, creating shear stress at the knee. In other words, this ankle mobility drill might be great for someone with healthy knees, but painful for someone with a history of knee pain.
Interestingly, if you consider the functional anatomy of the plantarflexors (calf muscles) while looking at this mobility exercise, you're really only putting the soleus on stretch. The gastrocnemius, actually crosses both the knee and ankle, working as a knee flexor and plantarflexor. So, while this drill may be "more functional" because it occurs in an upright position, it actually shortens the muscle at the knee as it lengthens it at the ankle. And, the more the knee tracks forward, the more symptoms those with knee pain will get.
To that end, if we think back to the functional anatomy lesson we just had, we can get the gastrocnemius to fully lengthen by combining knee extension with plantarflexion - which puts us in a great position that minimizes shear stress at the knee. Problem solved.
After someone has utilized this second drill for a while and minimized their symptoms, it can be progressed to a knee-break ankle mobilization, which still creates a bit of shear stress, but not nearly as much as the first video I showed. Because dorsiflexion is maxed out before knee flexion can occur, it seems - at least anecdotally - to reduce the discomfort that some folks feel.
Assuming you haven't been living under a rock for the past few years, you've surely learned that ankle mobility is imperative to long-term lower-extremity health in strength and conditioning programs and actual sport participation. If you need to learn why, check out this old post of mine: The Importance of Ankle Mobility.
While I think the industry has done a great job of highlighting the need for incorporating ankle mobility drills in one's warm-up, I'm not convinced that we've done a good job of "exhausting" our creativity when it comes to those drills, as most of them occur purely in the sagittal plane. While poor dorsiflexion is definitely the biggest issue at the ankle - and dorsiflexion does occur in the sagittal plane - I think we miss the boat when we only work on getting dorsiflexion in isolation. In reality, you need multi-planar ankle mobility to be prepared for life's events, so it's advantageous to train it a bit in your warm-ups.
So, I bring to you the wall ankle mobilization with adduction/abduction. It's just like a regular wall ankle mobilization, but when you get to end range, you gently rock back and forth between adduction and abduction (and internal rotation and external rotation, in the process) to make it more of a multi-directional movement that also challenges hip mobility a bit. A special thanks goes out to Kansas City Royals pitcher Tim Collins for helping with the demonstration here:
A few important coaching cues/notes:
1. Everyone always asks whether or not I care what the back foot/leg is doing, and I don't. Just focus on the front side.
2. The individual should feel a stretch in the posterior lower leg, not a pinching in the front. If there is pinching in the front, it's a good idea to refer out to a good manual therapist. In the meantime, you can train ankle mobility more conservatively with a rocking ankle mobilization:
3. If the individual's heel comes up off the ground, slide the foot closer to the wall to regress the exercise.
5. We usually perform this as three reps per leg, and each rep has a few glides toward adduction and abduction. You can use it during the warm-up, or as a filler between sets of compound movements. I like it between sets of deadlifts, since you're already barefoot or in minimalist sneaker.
6. If you're a heavy pronator (really flat feet and knock-knees), you probably don't need to do the adduction (rock in) portion of each rep.
I get asked all the time what sneaker I recommend for strength and conditioning. While no shoe is perfect for everyone and all tasks, I’ve certainly grown to love the more “minimalist” options on the market today that simulate barefoot training. In addition to strengthening the smaller muscles of the feet, barefoot training “accidentally” improves ankle mobility in athletes who have been stuck in restrictive shoes their entire lives.
That said, not all minimalist footwear options are created equal – and I can speak from experience, as I have tried out just about every version on the market today.
My use of old-school Converse All-Stars (“Chuck Taylors") could probably be considered my original “foray”into minimalist footwear, as I gravitated toward them because they were flat-soled and allowed me to better drive through my heels while squatting and deadlifting in powerlifting. Unfortunately, they weren’t very comfortable, weren’t particularly aesthetically appealing, and I couldn’t really do much single-leg work or sprinting in them the way that I wanted to because they just felt restricting at the ankles (admittedly, I had the high-top version). Plus, I always felt like people automatically lived in my parents' basement and played Dungeons and Dragons because I wore them.
From there, I went to the Nike Free back in 2006 – and was pretty impressed. Unfortunately, my enthusiasm tailed off quickly, as I beat these sneakers into the ground almost overnight. The panels on the bottoms would fall off all the time when we pushed the sled (we find 3-4 new “pieces” of Free on the floor at CP every day).
And, the sneaker design actually seemed to “de-evolve,” as the upper and sides seemed to get stiffer while the heel lift increased (pictured below is the 7.0, and while the lower digit versions are a bit less stiff, there still seemed to be a general shift toward "normalcy" in terms of heel lift).
Looking for an alternative, I tried on a Reebok Travel Trainer (yes, only one) on in a store – and quickly returned it to the box before lacing up the other sneaker. It felt so low in the back that I literally thought I’d come out of the shoe altogether if I tried to run – and this was a sentiment echoed by my wife, who owns a pair and has worn them a whopping one time for a training session…a mistake she’ll never make again, as they are buried in some closet with her 13,000 other pairs of shoes. Using an excavating helmet and my Dora the Explorer flashlight, I managed to find them:
Then, earlier this year, an employee of Vibram Five Fingers kindly gave me a pair of their shoes to try out. I really liked it for walking around the facility and training my bilateral lower-body lifts, but was not a fan of it for single-leg training, as it beat up my big toe on the trailing leg in lunges. I'm also a heavy supinator, so it wasn't a good fit for me with sprinting.
However, I do love the material on the bottom, as it is one solid piece that couldn’t fall apart like the Frees do. I also liked the pliability of the upper section; it had just the right amount of give. That said, like most folks I’ve met who wear the Vibram Five Fingers, I could have done without the “Five Fingers” part, from an aesthetic standpoint. It's the absolute closest you can get to true barefoot training.
Luckily for me, though, the clouds opened up and I finally found a pair of minimalist sneakers that I love "all-around" when I got hooked up with a pair of the New Balance Minimus. The new "training" shoe, which is pictured below, actually debuted in July of 2011, with more colors and styles added to the product line in the months that followed. These bad boys are the real deal: durable bottoms, the same upper “feel” of the Five Fingers (they actually collaborated with Vibram on the trail version, which feels similar to the Five Fingers, minus the toes), and just enough protecting at the big toe to keep me from getting banged up on lunges. There is also sufficient padding in the back to ensure that you don't slip out like one does with the Travel Trainer. Tony and I each have a pair, as does the First Lady of Cressey Performance (for the record, Tony's are the pink ones):
I’ve used it for everything from sprinting, to jumping, to lifting and felt great. I feel like an absolute rock star because I don’t have to change footwear halfway through a session in my strength and conditioning program, and while that may be a sad commentary on my life, it doesn’t change the fact that it’s a damn good training show that I’ll be rocking for the foreseeable future. It's also quickly become the single most popular training shoe on the floor at Cressey Performance on a given day, as many of the athletes have followed our lead and been thrilled with their purchases.
You can check out the different styles of Minimus at NewBalance.com. I also liked this great interview on the research and development that went into creating the Minimus; it’s worth a read if you’re a geek like me.
Sign-up Today for our FREE Newsletter and receive a deadlift technique tutorial!
I just got back from a fun weekend in Orlando, but am a bit behind as I return to the office, so today's post will be a quick list of recommended reading for the day. Check these out:
The Importance of Ankle Mobility - We hear this mentioned all the time, but I go in to a bit more detail in this post and relate it in the context of my realm of expertise: training baseball players.
The Fragility of Whey Protein - Great blog post from Brian St. Pierre, for those of you who are looking for a bit of nutrition to kick off your week.
What I Learned in 2009 - I'm in the process of wrapping up this year's "What I Learned in 2010" article, so I thought it'd be a good time to rekindle last year's version.
More to come tonight....
Sign-up Today for our FREE Newsletter and receive a detailed deadlift technique tutorial!


 Based in South Florida, Dr. James Spencer is a Sports Performance Chiropractor, Certified Athletic Trainer, and Fellow of the International Academy of Medical Acupuncture. He has formal training in Active Release Techniques, Graston Technique, Kinetacore Functional Dry Needling, SpiderTech Kinesiology Tape, RockTape Fascial Movement Taping, Postural Restoration Institute, Y-Balance Test, FMS, SFMA, Mike Boyle’s Certified Functional Strength Coach and the Onnit Academy of Unconventional Training. You can find Dr. Spencer on


