Home Posts tagged "Anterior Pelvic Tilt"

Mid-Week Movement Miscellany

With the launch of my new podcast, I've been a bit quiet on the blogging front. However, I've got plenty of thoughts rattling around in my brain, so I thought I'd pull together an article on the topic. Heck, we might even make this a regular series. Here goes...

1. On average, female athletes respond differently to eccentric stress than male athletes do.

Last year, I wrote a blog (Making Movement Better: Duct Tape or WD40?) that touched on the fact that many pitchers lose range of motion at the shoulder and elbow as adaptations to the crazy high eccentric stress experienced during pitching. I also was careful to note that not everyone loses range of motion; in fact, some athletes gain motion (become more unstable). 

Perhaps unsurprisingly, research in the softball pitching world shows that females don't lose range-of-motion following softball pitching even though they're still encountering noteworthy eccentric stress. Females are more likely to be hypermobile, so it makes sense that they become more unstable than they do "tight." In short, you probably aren't going to have to work as hard to gain ROM in softball pitchers; your efforts are better directed at regaining neuromuscular control with low-level stabilization exercises.

2. Reaching exercises should drive thoracic flexion and scapular upward rotation, but not necessarily pec recruitment.

On a recent Instagram Q&A, I received the question (paraphrased), "How can I get better scapular contact on the ribs during reaches without too much pec recruitment?" Here was my answer:

3. The best coaching cue for an exercise might just be to do a different exercise.

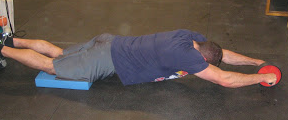
Also on that Q&A, I got an inquiry about what to do with low back pain due to excessive arching at the bottom of an ab wheel rollout. The answer was pretty simple: regress the exercise; you aren’t ready for ab wheel rollouts.

With anterior core exercises like this, it works a bit like a seesaw: the further the arms go away from the body, the harder the exercise feels (imagine moving a little kid to the end of a seesaw; his weight doesn't change, but the amount of force at the other end of the seesaw needed to offset him does simply because of his positioning). When an individual dumps into anterior pelvic tilt/lordosis (excessive arching) as the arms get further away from the body on a rollout, it's one means of shortening that distance. And, it allows the individual to hang out on the passive restraints on the posterior aspect of the spine instead of using active muscular control to create stability.

A better option would be a stir the pot, stability ball rollout (if you don't go DOWN as far, you don't go OUT as far), or even just a regular prone bridge. These regressions are easy inclusions that are tremendously helpful when dealing with less trained individuals or athletes with long limbs (and spines).

If you're looking to learn a bit more about this topic, I'd encourage you to check out my resource, Understanding and Coaching the Anterior Core. This seminar presentation is a thorough tutorial on how to best coach and program these invaluable exercises.

Sign-up Today for our FREE Newsletter and receive a four-part video series on how to deadlift!

Name
Email
Read more

6 Reasons Anterior Core Stability Exercises Are Essential

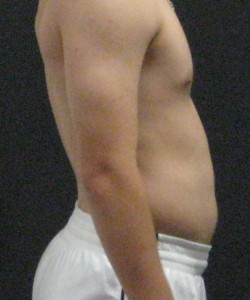
This time of year, I'm doing a lot of assessments on college baseball players who are just wrapping up their seasons.  One of the biggest issues that I note in just about every "new" athlete I see is a lack of anterior core control. In other words, these athletes sit in an exaggerated extension pattern that usually looks something like this:

APT-250x300

And, when they take their arms overhead, they usually can't do so without the ribs "flaring" up like crazy.

This is really just one way an athlete will demonstrate an extension posture, though. Some athletes will stand in knee hyperextension. Others will live in a forward head posture. Others may have elbows that sit behind their body at rest because their lats are so "on" all the time.

latsPosture

This isn't just about resting posture, though; most of these athletes will have faulty compensatory movement patterns, too. Once we've educated them on what better posture actually is for them, we need to include drills to make these changes "stick." Anterior core drills - ranging from prone bridges, to positional breathing, to dead bugs, to reverse crunches, to rollouts/fallouts - are a great place to start. Here's why they're so important:

1. Breathing

The muscles of your anterior core are incredibly important for getting air out. The folks at the Postural Restoration Institute often discuss how individuals are stuck in a state of inhalation, with each faulty breath creating problematic accessory tone in muscles like scalenes, lats, sternocleidomastoid, pec minor, etc. These muscles aren't really meant to do the bulk of the breathing work; we should be using our diaphragm. Unfortunately, when the rib cage flies up like we saw earlier, we lose our Zone of Apposition (ZOA), a term the PRI folks have coined to describe the region into which our diaphragm must expand to function.

Zone-of-Apposition-300x220

(Source: PosturalRestoration.com)

Step 1 is to get the ribs down and pelvis into some posterior tilt to reestablish this good zone. Step 2 is to learn how to breathe in this position, emphasizing full exhalation.

Step 3, as you may have guessed, is to strengthen these "newly rediscovered" patterns with good anterior core training.

2. Resisting extension.

This one is the most obvious benefit, as the muscles of the anterior core directly combat too much arching of the lower back. If you aren't controlling excessive lumbar extension, it's only a matter of time until you wind up with lower back irritation - whether it's just annoying tightness, a stress fracture, a disc issue, or something else.

3. Better force transfer and lower back injury risk reduction.

The research on core function is pretty clear: its job is to transfer force between the lower and upper body. Spine expert Dr. Stuart McGill has spoken at length about how spine range of motion and power are positively correlated with injury risk. In other words, the more your spine moves (to create force, as opposed to simply transferring it), the more likely you are to get hurt. How do you prevent your spine from moving excessively? You stabilize your core.

4. Indirect effects on rotary stability.

For a long time, I looked at control of extension as "separate" from control of rotation at the spine. In other words, we did our anterior core drills to manage the front of the body, and our chops, lifts, side bridges, etc. to resist unwanted rotation. However, the truth is that these two approaches need to be treated as synergistic.

As an example, every time I've seen an athlete come our way with an oblique strain, he's sat in an extension posture and had poor anterior core control - even though an oblique strain is an injury that occurs during excessive rotation. All you need to do is take a quick glance at the anatomy, and you'll see that external obliques (like many, many other muscles) don't function only in one plane of motion; they have implications in all threes - including resisting excessive anterior pelvic tilt and extension of the lower back.

Gray392

What this means is that you can't simply ignore coaching in one plane when you think you're training in another one. When you do your chops and lifts, you need to prevent lumbar hyperextension (arching) . And, when you do your rollouts, you can't allow twisting as the athlete descends. Finally, you can add full exhales (a predominantly anterior core challenge) to increase the difficulty on rotary stability exercises.

5. Improved lower extremity function and injury risk reduction.

Lack of anterior core control directly interferes with lower extremity function, too. If the pelvis "dumps" too far forward into anterior tilt, the front of the hip can get closed down. As I described at length here, this can lead to hip impingement.

With a squat variation, while some athletes will stop dead in their tracks with this hip "block," others will slam into posterior tilt to continue descending. This is the "butt wink" we've come to see over and over again in lifting populations. When neutral core positioning is introduced and athletes also learn to manage other extension-based compensations, the squat pattern often improves dramatically. This can "artificially" be created transiently elevating the heels, turning the toes out, or by having an athlete hold a weight in front as a counterbalance.

Additionally, athletes in heavy extension patterns often carry their weight too far forward, throwing more shear stress on the knees during lunging and squatting. The more we can keep their weight back to effectively recruit the posterior chain, the better.

6. Improved shoulder function and injury risk reduction.

The lats can be your best friend and worst enemy. On one hand, they have tremendous implications for athletic performance and aesthetics. On the other hand, if they're "on" all the time (as we often see in extension-based postures), you can't get to important positions with the right movement quality. Overactive lats will limit not only shoulder flexion (overhead reaching), but also upward rotation of the shoulder blades. I covered this in quite a bit of detail in Are Pull-ups THAT Essential?. Moreover, with respect to elbow function, overactive lats can be a big issue with allowing throwers to get true external rotation, as I discussed here:

If you're using your lats as an "all the time" core stabilizer, you aren't just at risk of extension-based low back pain, but also problems at the shoulder and elbow. If you can get your anterior core control under control and normalize the length and tone of the lats, your "healthy exercise pool" for the upper body expands dramatically. Getting overhead is easier, and you'll feel stronger in that position. The same goes for external rotation; not surprisingly, pitchers always say that their lay-back feels smoother after soft tissue work on the lats, as an example.

Wrap-up

These are just six benefits of training the anterior core, but the truth is that they could have been broken down in much more detail as they relate to specific injuries and functional deficits. If you're looking to learn more on this front - and get a feel for how I like to train the anterior core - I'd encourage you to check out my presentation, Understanding and Coaching the Anterior Core.

AnteriorCore

Sign-up Today for our FREE Newsletter and receive a four-part video series on how to deadlift!

Name
Email
Read more

6 Tips for People Who Stand All Day

Sitting has been blamed for a lot of the "modern" musculoskeletal conditions and poor posture we see in today's society, and rightfully so: being stuck in this posture all day is an absolutely terrible way to treat your body.

Fortunately, by teaching folks to get up and move around during the day, we can break the "creep" that sets in over the course of time.  Additionally, we can implement ergonomic adjustments (e.g., standing desks) and mobility and strength training programs that favorably impact posture to prevent these issues from becoming a serious problem long-term.

Unfortunately, though, in the process of focusing our heavy attention on those who sit all day, we've forgotten to show some love to the individuals who have to spend the entire day on their feet.  And, this is actually a large segment of the population, encompassing the majority of young athletes, manual laborers, and - you guessed it - fitness professionals and coaches. 

My name is Eric, and I have a problem: standing 8-10 hours per day.

It's important to appreciate that "good posture" is different for everyone.  If I sit all day, I'll probably wind up in posterior pelvic tilt. Conversely, when you see folks who stand all day, it's generally greater lordosis and anterior pelvic tilt):

Of course, I should reiterate that this is a generalization. There are folks who sit all day who do so in anterior tilt, and those who stand all day in posterior tilt.  As such, you have to be careful to assess and not assume.

With all that aside, let's talk about my top six tips for those who stand all day.

1. Stand differently.

This is clearly the most obvious of the bunch, but it never ceases to amaze me that folks will ask for all the best exercises to correct X posture or Y condition, yet they won't pay attention to modifying their daily postural habits to get the ball rolling.

If you're on your feet and stuck in extension all day, engage the anterior core and activate the glutes to get yourself into a bit more posterior pelvic tilt.  Doing so can take you to a position of discomfort to one of complete relief in a matter of seconds. 

Remember that these adjustments have to be conscious before they can become subconscious.  In other words, be consistent with these basic adjustments and eventually you'll find yourself establishing a better resting posture.

2. Learn to exhale fully.

The rectus abdominus and external obliques are two prominent muscles responsible for exhalation.  Both of them also posteriorly tilt the pelvis.  As such, when you learn to exhale fully, the pelvis posteriorly tilts and the ribs come down, taking you out of excessive lordosis and relieving some of the annoying lower back tightness you may be experiencing.  One of my favorite drills for this was inspired by the Postural Restoration Institute.  Deep squat breathing gets you some length of the latissimus dorsi (a gross extensor) and flexes the spine back toward neutral.  During inhalation, the belly pushes out against the quads to make sure that the individual isn't breathing into the supplemental respiratory muscles (e.g., sternocleidomastoid, scalenes, pec minor) we don't want to use.  Then, we just try to get all the air out on each exhale.

Of course, there are several other options you can use on this front as long as you understand the positions you're trying to achieve and the cues you want to integrate.

3. Break your day up with "relief" postures.

I always tell our clients that the best posture is the one that is constantly changing.  It's healthy to be a good "fidgeter." This also applies to the way you stand - or your avoidance of excessive standing.  You simply have to break up the day.  Maybe you try to find time to sit, lay on your back for a bit, or go into a half-kneeling (lunge) position.  These are great benefits of being a fitness professional; you're constantly going from one position to the next for the sake of demonstrating or coaching an exercise.

If rolling around on the ground isn't an option, look to integrate a split-stance position while standing.  It's much more difficult to hang out in excessive lordosis and anterior pelvic tilt if you're in a split-stance position than if your feet are side-by-side.  It's also one reason why we teach all of our wall slide variations with one leg forward (usually the right leg).

4. Work in low-level anti-extension drills throughout the day.

If you do have the freedom in your schedule and responsibilities to incorporate some different mobility drills during the day, here are some quick and easy ones you can apply without any equipment.

5. Avoid feeding into your resting postural dysfunction with flawed training approaches.

People who stand in extension can usually "get away with it" if they train well.  When they stand in extension all day and then feed into this dysfunction in their training programs, things can get worse sooner than later.  In other words, if you're standing all day and then you crush hyperextensions in all your workout routines, expect to have a really tight lower back. 

However, it's not just hyperextensions that would be a problem.  Rather, doing a ton of arching on the bench press and squat could make things worse as well.  You may not be a candidate for an aggressive powerlifting-style bench press with a big arch, as an example. However, a more moderate set-up should be fine.

As important as what not to do is what you should do - and you should definitely work on glute activation/posterior chain strength from a neutral spine position...

...as well as anterior core stability with prone bridges, reverse crunches, and rollout/fallout variations.

Take all together, I'm basically saying that if you have an extension bias in your daily life, you probably need a flexion bias in your training.  Likewise, if you have a flexion bias in your daily life, you probably need an extension bias in your training.

6. Play around with footwear.

Not all feet are created equal, and I'm a perfect example: I have super high arches.  Heavy supinators like me typically don't do well on hard surfaces for extended periods of time, as we're built more for propulsion than deceleration (probably one more reason that I'm a powerlifter and not a distance runner).  So, you can imagine what walking around on these floors for 8-10 hours per day does to my knees and lower back.

I'm able to minimize the stress by putting some cushioned insoles in my sneakers and changing them every 6-8 weeks.  The insoles don't change the contour of the shoe; they just offer some padding.  Conversely, heavy pronators may do better for extended periods of times on their feet by wearing firmer shoes, or trying out some orthotics.  The answer is different for everyone, but at the end of the day, the take-home message is the same: if you're going to be on your feet all day, you better find the right footwear for you.

Wrap-up

If you've read this entire article, chances are that you feel my pain - literally and figuratively - and realize the standing all day can be just as problematic as sitting all day.  Fortunately, I can promise you that these strategies do work, as I employ them every day myself.  Give them a shot and you'll find that "standing around" is much more tolerable.

Sign-up Today for our FREE Newsletter and receive a four-part video series on how to deadlift!

Name
Email
Read more

Quick and Easy Ways to Feel and Move Better: Installment 28

Here's this week's list of tips to get your nutrition and strength and conditioning programs on track.  Greg Robins took a break this week, so I'm stepping up my game and covering this installment.

1. If you always squat, try a month without squatting.

There's an old saying in the strength and conditioning field that "the best program is the one you're not on." In other words, everything works, but nothing works forever.  Squats have come under a fair amount of scrutiny over the past few years as diagnoses of femoracetabular impingement have gone sky-high and we've encountered more and more people in the general population who simply don't move well enough to squat in good form.  So, it makes sense to not shove a round peg in a square hole; at the very least, try to remove them from your strength training programs for a month here and there.

In these instances, I like to start the training session with an axially-loaded single leg exercise for 3-6 reps/side.  If you're not good in single-leg stance, start on the higher side with a lighter weight. If you're a long-time single-leg believer, though, you can really load these up:

After that, you can move on to deadlifts, barbell supine bridges/hip thrusts, or any of a number of other exercises.  The point to take away from this is that eliminated loaded squatting variations for a month here and there won't set you back.

2. Work on the squat pattern, not just the squat.

A lot of folks struggle to squat deep because they lack the ability to posteriorly shift their center of mass sufficiently.  This is particularly common in athletes with big anterior pelvic tilts and an exaggerated lordotic curve.

If you give these athletes a counterbalance out in front of their body, though, their squat patterns "clean up" very quickly.  As such, in combination with other mobility/stability drills, I like to include drills to work on the actual squat technique both during their warm-ups and as one of the last exercises in a day's strength training program.  Goblet squats and TRX overhead squats are two of my favorites:

3. Make muffins healthier.

My favorite meal is breakfast, and I know I'm not alone on this!  Unfortunately, once you get outside some of the traditional eggs and fruit choices, things can get unhealthy very quickly.  That's one reason why I'm a fan of Dave Ruel's recipe for the much healthier high protein banana and peanut butter muffins from Anabolic Cooking.  Dave has kindly agreed to let me share the recipe with you here:

Ingredients (for three muffins)
• ¾ cup oatmeal
• ¼ cup oat bran
• 1 tbsp whole wheat flour
• 6 egg whites
• ½ scoop vanilla protein powder
• ¼ tsp baking soda
• ½ tsp stevia
• 1 tbsp natural peanut butter
• 1 big banana
• ½ tsp vanilla extract
• ½ tsp banana extract

Directions
1. In a blender, mix all the ingredients (except for the banana). Blend until the mix gets thick.
2. Cut the banana in thin slices or cubes. Add the banana to the mix and stir (with a spoon or a spatula)
3. Pour the mix in a muffin cooking pan, and cook at 350°F. Until cooked (about 30 minutes).

Nutrition Facts (per muffin)
Calories: 190
Protein: 17g
Carbs: 18g
Fat: 4.5g

Quick tip: you can cook a big batch and freeze the muffins, then just microwave them when needed down the road.

Anabolic Cooking is on sale for $40 off until tonight (Friday) at midnight, so I'd encourage you to check it out and enjoy the other 200+ healthy recipes Dave includes.  My wife and I cook from this e-book all the time.

4. Dominate the back-to-wall shoulder flexion drill before you overhead press.

Whether your shoulders are perfectly structurally sound or not, overhead pressing can be a stressful activity for the shoulder girdle.  To that end, you want to make sure that you're moving well before you move overhead under load.  I like to use the back-to-wall shoulder flexion "test" as a means of determining whether someone is ready to overhead press or snatch (vertical pulling is a bit different).  Set up with your back against the wall, and your heels four inches away from the wall.  Make sure your lower back is flat against the wall, and make a double chin while keeping the back of your head against the wall.  Then, go through shoulder flexion.

If you can't get your hands to touch the wall overhead without bending the elbows, going into forward head posture, arching the back, or moving the feet away from the wall, you fail.  Also, pain during the test is a "fail," too.  Folks will fail for all different reasons - but a big chunk of the population does fail.  Fortunately, a bit of cueing and some corrective drills - and just practicing the test - will go a long way in improving this movement quality.  Hold off on the snatches and military presses in the meantime, though.

5. Drink with a straw to get better about water intake.

I always give my wife, Anna, a hard time about how little water she drinks.  She'll get busy at work and will simply forget to have a sip of water for 5-6 hours.  Other times, though, she just doesn't want to drink cold water - because it's winter in New England and she is always trying to get warm!  One quick and easy solution to the later problem is to simply drink with a straw, as water won't contact your teeth, which are obviously very cold-sensitive.  My mother gave Anna a water bottle with a straw for Christmas, and she's been much better about water consumption ever since.  Try it for yourself.

Sign-up Today for our FREE Newsletter and receive a four-part video series on how to deadlift!

Name
Email
Read more

How to Front Squat: Everything You Need to Know

The squat is one of the most revered strength training exercises of all time, and the front squat is a popular variation on this compound lift.  However, like many lifts, it's often performed incorrectly, and in many cases used by folks for whom it isn't a good fit.  To that end, I thought I'd devote this article to outlining everything you need to know to be successful with the front squat.

What Makes the Front Squat Different?

A few primary factors differentiate a front squat from a traditional back squat.

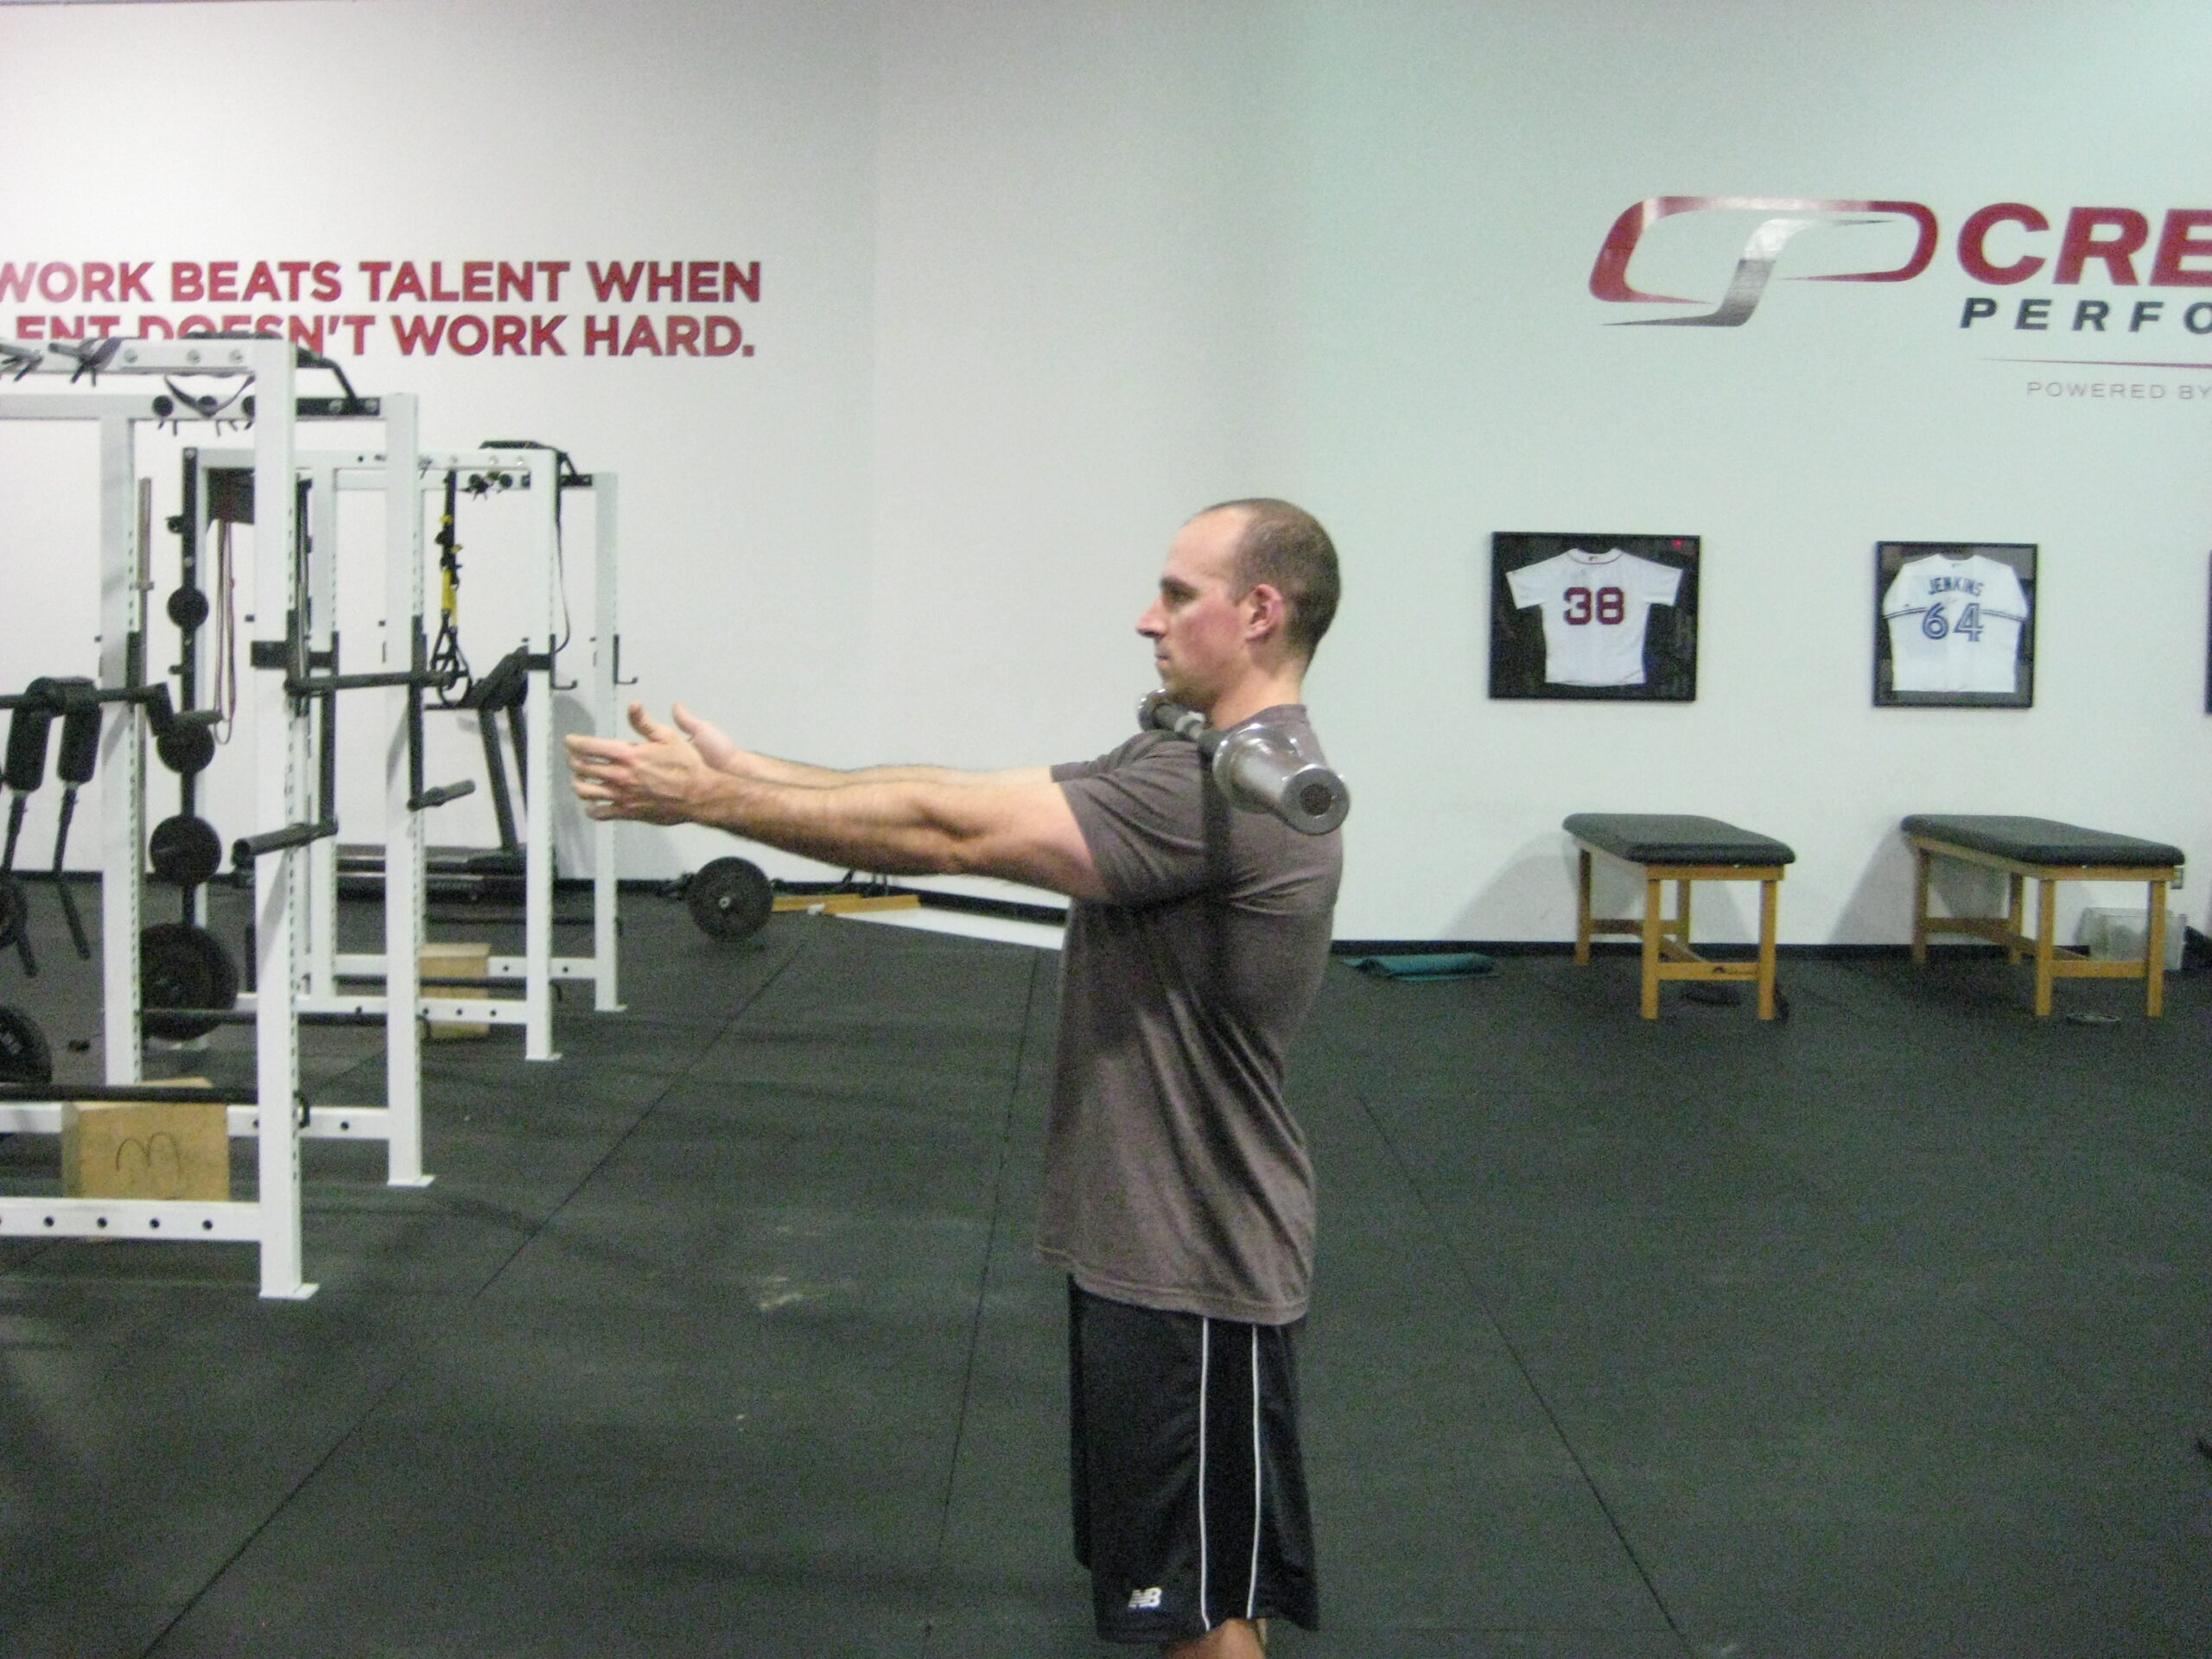
First, the bar is positioned on the front of the shoulder girdle rather than on the upper back.  In the process, an athlete is given a counterbalance to allow for a better posterior weight shift, which improves squat depth.  If you need proof, check out your body weight squat, and then retest it while holding a ten-pound plate out at arm's length; most of you will improve substantially.

Second, because the arms are elevated (flexed humeri), the lats are lengthened.  This is in contrast to the back squat, where the lats can be used to aggressively pull the bar down into the upper back and help create core stability.  I firmly believe the lack of lat involvement is what accounts for the significant differences in loads one can handle in the front squat as compared to the back squat.  However, "quieting down" the lats on the front squat is likely why athletes with such dramatic lordotic posture can often squat much deeper/cleaner with the front squat.  Of course, if they have an excessive lordosis and anterior pelvic tilt, you may not want to squat them in the first place!

Third, the positioning of the bar in the front makes the front squat much more shoulder friendly than the back squat, assuming we aren't dealing with an acromioclavicular joint injury, which would be irritated by direct pressure of the bar.  In the back squat, the externally rotated "rack" position poses problems for athletes with poor upper body mobility, and it actually reproduces injury mechanisms at the shoulder and elbow in overhead athletes like baseball players, tennis players, volleyball players, and swimmers.

Fourth, the upright torso angle of the front squat reduces shear stress on the spine. More forward lean equates to more shear stress, as the resistance is moved further away from the axis of rotation; just think of a see-saw where your lower back is the middle point and you'll catch my drift. Moving the load further out also increases risk of going into excessive lumbar flexion under compressive load. The front squat – even under heavier loads – keeps a lifter more upright, or else he’ll simply dump the bar; it's somewhat of a self-limiting strength exercise.

Fifth, because the load is positioned further forward than in a back squat, there isn't as much of a pre-stretch for the posterior chain, so the front squat will be more quad dominant than the back squat, which will engage more glutes and hamstrings.  Of course, you can use front box squats to shuffle things up and get some variety, but we won't deviate from the point too much here.

Sixth, in the overwhelming majority of lifters, because of the upright torso angle and increased recruitment of quads relative to posterior chain, most lifters will use significantly less weight on the front squat than the back squat. All things considered, if you can achieve a comparable training effect with less external loading, you're dealing with what would generally be considered a safer exercise.

Contraindications

Some individuals simply aren't cut out for any kind of squatting, so before we even talk technique, it's important to start by separating these lifters out.  Some common contraindications for squatting include poor tolerance to compressive loading (e.g., symptomatic lumbar spine disc injuries) and femoroacetabular impingement (this bony block at the hips makes it virtually impossible to squat without developing issues acutely and chronically).

Specific to front squatting, poor hip mobility, ankle mobility, core stability can be problematic, but perhaps nothing is as big of a buzzkill for front squatting as a kyphotic posture.  As I demonstrate with my Quasimodo impression in this photo, it's impossible to get the elbows up when you're rounded over like a scared cat.


These are really just the tip of the iceberg in terms of potential contraindications, but they serve as examples of how we need to fit the exercise to the lifter and not vice versa. With that out of the way, let's talk...

Technique!

We'll start with the hand positioning, as it's the most hotly contested portion of the front squat technique debate.  Only a video will do it justice:

When it comes time to unrack the bar, I cue the athlete to push the elbows up high and take air into the belly as they stand up the weight.  This combination of "elbows up" (shoulder flexion) and "air in" prevents the bar from rolling - either because the arms are angled down or because the torso goes to mush as the rib cage comes down.

After the weight is walked out, the athlete should take a slightly outside hip width stance, with the toes angled slightly out.  One of the biggest mistakes I see is that athletes go too wide with their stance, and the end result is that the knees have nowhere to go but in:

To piggyback on the "feet in, knees out" cue, I encourage athletes to think of "squatting between the knees, not over them."  This seems to get folks to the right balance of "sit back" and "sit down," as an (Olympic) front squat will have more "sit down" than a back squat or box squat variation. Additionally, a regular back squat will be slightly wider in stance than a front squat for most folks, and a box squat will certainly be even wider.

"Elbows up" is a cue that resounds throughout the movement, and it's especially important in the bottom position, when the bar will want to roll the most.  Regardless of the hand position you select, make sure the elbows are at or above the level of the bar at all times.  One great drill for practicing is to simply unrack the bar hands-free and gradually build up loads.  If you can get comfortable with this set-up, you'll always remember to think "elbows" and not "hands."

As you come out of the hole and accelerate toward lockout, make sure you don't get lazy as you enter the easy portion of the strength curve.  This is where front squatting with chains can be very helpful; it educates you on how to accelerate right up to lockout, where the hips and knees extend fully simultaneously.  If you don't have chains, try loading the last ten pounds of weight as 2.5-pound weights (two on each side). Position the clamp about an inch further out than it would normally be so that they can "clank" a bit.  Your goal is to make the 2.5-pound plates rattle at the top of each rep.  Finish with the glutes as you stand tall, and reset your breath before descending for subsequent reps.

Speaking of reps, stay away from doing high-rep front squats.   Sets of six should be the maximum you do, as muscles involved in maintaining the "rack" position may fatigue early and compromise the safety of the exercise.

Equipment Considerations

There are three important equipment considers to take into account.

First, your shoes should have a subtle heel lift.  It doesn't have to be an Olympic lifting shoe, but something that is totally flat to the ground won't work for the majority of folks.  It'll take some tremendous ankle mobility to squat deep without a little lift - even if it's only a few millimeters.  Front squatting (assuming an upright, Olympic stance) barefoot is probably not a great idea; I can count on one hand the number of people I've seen do it in good technique in the past 4-5 years since the barefoot craze took off.  Minimalist shoes are fantastic, but not necessarily for deep, Olympic-style squatting. If you're rocking a Minimalist sneaker, you can always slide a five-pound plate under the heel.

Second, be careful with shirts made of "wicking" fabric.  While they may be super comfortable, they do tend to allow the bar to slide a bit too much, especially if you're using a bar that doesn't have much knurling.  A quick solution to this is to spread some lifting chalk around the collar and chest to help the bar grab the shirt a bit more - or you could just wear a different shirt.

Third, many front squat newbies will really struggle with the discomfort of the bar position as they're learning to the bar-in-front technique.  While everyone ultimately adjusts to this discomfort (especially if they add some muscle mass to the area), one strategy to help athletes get by in the short-term is to just have them wear two shirts while they front squat.  This extra layer of padding is subtle and won't change the technique of the exercise, but will make it more tolerable during the learning phase.  You can taper an athlete off of it shortly thereafter.

Closing Thoughts

Squats aren't for everyone, but if you are going to squat, the front squat is one great option. Put these coaching cues and strategies into action, and you'll be front squatting safely and moving big weights in no time.

Looking for more detailed training tutorials like this, and a program in which front squatting is incorporated? Check out The High Performance Handbook, the most versatile strength and conditioning program on the market.

Sign-up Today for our FREE Newsletter and receive a four-part video series on how to deadlift!

Name
Email
Read more

5 Reasons You Have Tight Hamstrings

There might not be a more obnoxious and stubborn athletic injury than the hamstrings strain.  When it is really bad, it can bother you when you're simply walking or sitting on it.  Then, when a hamstrings strain finally feels like it's getting better, you build up to near your top speed with sprinting - and it starts barking at you again.  In other words, a pulled hamstrings is like a crazy, unpredictable mother-in-law; just when you think you've finally won her over, she brings you back down to Earth and reminds you how much more she liked your wife's old boyfriend.

However, not all hamstrings pain cases are true strains; more commonly, they present as a feeling of "tight hamstrings."  If one is going to effective prevent this discomfort, rehabilitate it, or train around it, it's important to realize what is causing the hamstrings tightness in the first place.  Here are five reasons:

1. Protective Tension of the Hamstrings

This is readily apparent in someone who has a crazy anterior pelvic tilt, which puts a big stretch on the hamstrings, which posteriorly tilt the pelvis.  When someone is extremely anteriorly tilted, the hamstrings are constantly "on" to prevent someone from ending up with extension-based back pain, such as spondylolysis (vertebral fractures), spondylolisthesis (vertebral "slippage"), and lumbar erector tightness/strains.  This is a problem most commonly seen in females (greater anterior pelvic tilt than men) and athletes:

APT-250x300

Doing a lot of longer duration static stretching for the hamstrings in this population usually isn't a great idea, as you run the risk of making someone more unstable - particularly in the case of females, who have less rigid ligamentous restraints (more congenital laxity) to protect them.  To that end, our approach with these folks is to use the warm-ups to foam roll the area, then do some hamstrings mobilizations to transiently reduce stiffness in the hamstrings.

After this reduction in stiffness, we work to build stability in synergists to the hamstrings in posterior pelvic tilt.  In other words, there's a heavy emphasis on glute activation and anterior core recruitment both with a strength training program and postural reeducation for the other 23 hours of the day.

At the end of the training session, with the male athletes, we may do some shorter duration hamstrings stretching just to "dissipate" a little eccentric stress.  I like ten seconds in each of these three positions:


The thing to remember is that while you can do everything right with these athletes in training, what they do with their posture during the rest of their lives is of paramount importance.  If they continue to stand around in anterior tilt and don't help the new stiffness they've developed "stick," they'll continue to over-rely on their already tight hamstrings.

2. Neural Tension

Just because you feel hamstrings tightness doesn't mean that the hamstrings are actually the source of the problem.  In fact, it's not uncommon at all for those with lumbar disc issues to present with radicular pain, tightness, or numbness/tingling into the legs - especially the hamstrings.  The symptoms may also come from nerve entrapment (most commonly the sciatic nerve) on soft tissue structures further down the chain.  Just aggressively stretching the hamstrings can actually make these symptoms worse, so it's important to see a medical professional to rule out causes further up with the appropriate clinical exams, such as the slump test.

3. Truly Tight Hamstrings

In order for hamstrings to really be short, one would have to spend a lot of time with the knee flexed and hip extended - so just imagine the position you're in at the top of a standing leg curl.  That's a hard pose to hold for an extended period of time, much less do so on a regular basis.

That said, some folks do get somewhat close to that on a daily basis in the sitting position, and are therefore the most likely to really have "tight hamstrings." They have to be in posterior pelvic tilt and knee flexion for a considerable chunk of the day - and even then, it's still pretty tough to be truly short, as they are still in hip flexion.

These folks usually can't distinguish hip flexion from lumbar flexion, so if you do a standing hip flexion assessment, rather than maintain the neutral spine we see in this photo, they'll go into lumbar flexion (butt will "tuck under").

The same trend will usually be noticeable with any kind of squat unless they have a tremendous amount of core stiffness to overcome the posterior hip stiffness that's present.  If you test these folks on an straight leg raise, it isn't pretty, as the pelvis is already posteriorly tilted.  In a pelvis that starts in "neutral" on a straight leg raise, roughly the first 1/3 of movement that you see comes from posterior tilt of the pelvis before the femur ever starts to flex on the acetabulum of the pelvis.  These folks are usually already posteriorly tilt, so that 1/3 is already used up; you're really only measuring hip flexion and not hip flexion PLUS posterior pelvic tilt.  And, as you can imagine, if someone is truly short in the hamstrings, that straight leg raise isn't going to be pretty. Obviously, these folks usually have a terrible toe touch pattern as well.

This should also educate you on why you can't treat all hamstrings strains the same.  In the protective tension example earlier, we needed to work to regain stability to hold a position of a bit more posterior pelvic tilt.  We'd cue glute activation, and use exercises that draw folks back into posterior tilt (e.g., reverse crunches).  If you have someone has a pulled hamstrings because they are truly short from already being in posterior pelvic tilt, though, some of these cues and exercises would be contraindicated. You'd be feeding the dysfunction.

While manual therapy and stretching for the posterior hip is valuable, again, it must be followed by stabilization work at adjacent joints with the pelvis in a neutral position.  These folks can benefit from training hip flexion above 90 degrees as well, as it educates them on how to flex the hip without rounding the lumbar spine.  This is one reason why I think a lot of the chop and lift exercises we've learned from Gray Cook are so fantastic; they teach us anti-rotation and anti-extension stability in various positions of hip flexion while the pelvis is in neutral.  They make changes "stick" better.

4. Previous Hamstrings Strain

Not to be overlooked in this discussion is the simple fact that the single-best predictor of hamstrings strains is a previous hamstrings injury.  One you have an injury, that area may never be the same from a tissue density standpoint - whether it's the surrounding fascia or the muscle or tendon itself.  A previous injury can leave athletes feeling "tight" in the region, so regular manual therapy can certainly help in this regard.

Anecdotally, the athletes with the long-term problems seem to be the ones with the pulls up on the gluteal fold, right where the hamstrings tendons attach to the ischial tuberosity.  The area gets "gunked up"in a lot of athletes as it is because of all the tissues coming together and exerting force in a small area, but it's especially problematic in those who have a previous injury in the region.  Perhaps more problematic, though, is the fact that we sit on our proximal hamstrings attachments - and that isn't exactly good for blood flow and tissue regeneration.

Semimembranosus_muscle-2 

I haven't seen any research on it, but I have a feeling that if you looked at this region in a lot athletes with ultrasound (similar to this study with patellar tendons), you'd find a ton of people walking around with substantial degenerative changes that could be diagnosed as tendinosis even though they haven't actually hit a symptomatic threshold.  My guess is that it's even worse in the posterior hip region because a) we sit on it, b) the ischial tuberosity is a more "congested" area than the anterior knee), and c) the study I noted above used 14-18 year-old athletes, and degenerative problems will get worse as one gets older (meaning this study likely undercut the true prevalence across the entire population).

Very simply, an athlete with a previous hamstrings strain needs to stay on top of quality manual therapy on the area, and be cognizant of maintaining mobility and stability in the right places.  They have less wiggle room with which to work.

5. Acute Hamstrings Strain or Tendinosis

Of course, the fifth reason you hamstrings might be tight is because you might actually have a hamstrings injury!  It could be an actual hamstrings strain, or just a tendinosis (overuse issue where tissue loading exceeds tissue tolerance for loading).  There is no one perfect recommendation in this regard, as a tendinosis or grade 1 hamstrings strain is going to be much more tolerable than a grade 3 hamstrings strain where you have bruising all along the back of your thigh.  

In terms of maintaining a training effect with the less serious ones, here are a few suggestions:

a. When you are ready to deadlift, use trap bar deadlifts instead of conventional or sumo deadlift variations.  I explain a bit more about how the positioning of the center of gravity makes this more hamstrings friendly HERE.

b. Shorten up your stride on single-leg exercises.  This makes the movement slightly more quad dominant, but allows you to still get the benefits of controlling the frontal and transverse planes with appropriate glute and adductor recruitment at the hip.

c. Go with step-up and reverse sled dragging variations.  Eliminating the eccentric component can take a considerably amount of stress off the hamstrings, and both these exercises get the job done well.

d. If you're going to squat, start with front squats at the beginning, and reintegrate back squat and box squat variations later on, as they will be more hamstrings intensive.

e. Understand anatomy.  If you are in hip flexion and knee extension, you're going to really be stretching the hamstrings and likely irritating them in the process.  Select exercises that don't hit these painful end-ranges, and then gradually reintroduce more dramatic ranges of motion as the issues subside.

f. Do hill sprints before you do regular sprints.  Your stride is going to be a bit shorter with hill sprints, and that'll take a considerable amount of stress off the hamstrings at heel strike (pretty good research on uphill vs. downhill sprinting HERE, for those who are interested).  Just don't go out and run as hard as you can the first time out; propulsive forces are still quite high.

Of course, this just speaks to how to train around a pulled hamstrings; there is really a lot more to look at if you want to really understand why they occur and how to prevent or address them.  In my eyes, this post was necessarily "geeky," as it is important that we don't dumb down complex injuries to "just stretch it out."  This recommendation is analogous to a doctor just telling someone to take some NSAIDs for regular headaches; it doesn't get to the root of the problem, and it may actually make things worse.

For more information, I'd encourage you to check out the Functional Stability Training series.

Sign-up Today for our FREE Newsletter and receive a four-part video series on how to deadlift!

Name
Email
Read more
Page
LEARN HOW TO DEADLIFT
  • Avoid the most common deadlifting mistakes
  • 9 - minute instructional video
  • 3 part follow up series