Sitting has been blamed for a lot of the "modern" musculoskeletal conditions and poor posture we see in today's society, and rightfully so: being stuck in this posture all day is an absolutely terrible way to treat your body.
Fortunately, by teaching folks to get up and move around during the day, we can break the "creep" that sets in over the course of time. Additionally, we can implement ergonomic adjustments (e.g., standing desks) and mobility and strength training programs that favorably impact posture to prevent these issues from becoming a serious problem long-term.
Unfortunately, though, in the process of focusing our heavy attention on those who sit all day, we've forgotten to show some love to the individuals who have to spend the entire day on their feet. And, this is actually a large segment of the population, encompassing the majority of young athletes, manual laborers, and - you guessed it - fitness professionals and coaches.
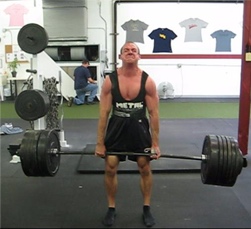
My name is Eric, and I have a problem: standing 8-10 hours per day.
It's important to appreciate that "good posture" is different for everyone. If I sit all day, I'll probably wind up in posterior pelvic tilt. Conversely, when you see folks who stand all day, it's generally greater lordosis and anterior pelvic tilt):
Of course, I should reiterate that this is a generalization. There are folks who sit all day who do so in anterior tilt, and those who stand all day in posterior tilt. As such, you have to be careful to assess and not assume.
With all that aside, let's talk about my top six tips for those who stand all day.
1. Stand differently.
This is clearly the most obvious of the bunch, but it never ceases to amaze me that folks will ask for all the best exercises to correct X posture or Y condition, yet they won't pay attention to modifying their daily postural habits to get the ball rolling.
If you're on your feet and stuck in extension all day, engage the anterior core and activate the glutes to get yourself into a bit more posterior pelvic tilt. Doing so can take you to a position of discomfort to one of complete relief in a matter of seconds.
Remember that these adjustments have to be conscious before they can become subconscious. In other words, be consistent with these basic adjustments and eventually you'll find yourself establishing a better resting posture.
2. Learn to exhale fully.
The rectus abdominus and external obliques are two prominent muscles responsible for exhalation. Both of them also posteriorly tilt the pelvis. As such, when you learn to exhale fully, the pelvis posteriorly tilts and the ribs come down, taking you out of excessive lordosis and relieving some of the annoying lower back tightness you may be experiencing. One of my favorite drills for this was inspired by the Postural Restoration Institute. Deep squat breathing gets you some length of the latissimus dorsi (a gross extensor) and flexes the spine back toward neutral. During inhalation, the belly pushes out against the quads to make sure that the individual isn't breathing into the supplemental respiratory muscles (e.g., sternocleidomastoid, scalenes, pec minor) we don't want to use. Then, we just try to get all the air out on each exhale.
Of course, there are several other options you can use on this front as long as you understand the positions you're trying to achieve and the cues you want to integrate.
3. Break your day up with "relief" postures.
I always tell our clients that the best posture is the one that is constantly changing. It's healthy to be a good "fidgeter." This also applies to the way you stand - or your avoidance of excessive standing. You simply have to break up the day. Maybe you try to find time to sit, lay on your back for a bit, or go into a half-kneeling (lunge) position. These are great benefits of being a fitness professional; you're constantly going from one position to the next for the sake of demonstrating or coaching an exercise.
If rolling around on the ground isn't an option, look to integrate a split-stance position while standing. It's much more difficult to hang out in excessive lordosis and anterior pelvic tilt if you're in a split-stance position than if your feet are side-by-side. It's also one reason why we teach all of our wall slide variations with one leg forward (usually the right leg).
4. Work in low-level anti-extension drills throughout the day.
If you do have the freedom in your schedule and responsibilities to incorporate some different mobility drills during the day, here are some quick and easy ones you can apply without any equipment.
5. Avoid feeding into your resting postural dysfunction with flawed training approaches.
People who stand in extension can usually "get away with it" if they train well. When they stand in extension all day and then feed into this dysfunction in their training programs, things can get worse sooner than later. In other words, if you're standing all day and then you crush hyperextensions in all your workout routines, expect to have a really tight lower back.
However, it's not just hyperextensions that would be a problem. Rather, doing a ton of arching on the bench press and squat could make things worse as well. You may not be a candidate for an aggressive powerlifting-style bench press with a big arch, as an example. However, a more moderate set-up should be fine.
As important as what not to do is what you should do - and you should definitely work on glute activation/posterior chain strength from a neutral spine position...
...as well as anterior core stability with prone bridges, reverse crunches, and rollout/fallout variations.
Take all together, I'm basically saying that if you have an extension bias in your daily life, you probably need a flexion bias in your training. Likewise, if you have a flexion bias in your daily life, you probably need an extension bias in your training.
6. Play around with footwear.
Not all feet are created equal, and I'm a perfect example: I have super high arches. Heavy supinators like me typically don't do well on hard surfaces for extended periods of time, as we're built more for propulsion than deceleration (probably one more reason that I'm a powerlifter and not a distance runner). So, you can imagine what walking around on these floors for 8-10 hours per day does to my knees and lower back.
I'm able to minimize the stress by putting some cushioned insoles in my sneakers and changing them every 6-8 weeks. The insoles don't change the contour of the shoe; they just offer some padding. Conversely, heavy pronators may do better for extended periods of times on their feet by wearing firmer shoes, or trying out some orthotics. The answer is different for everyone, but at the end of the day, the take-home message is the same: if you're going to be on your feet all day, you better find the right footwear for you.
Wrap-up
If you've read this entire article, chances are that you feel my pain - literally and figuratively - and realize the standing all day can be just as problematic as sitting all day. Fortunately, I can promise you that these strategies do work, as I employ them every day myself. Give them a shot and you'll find that "standing around" is much more tolerable.
Sign-up Today for our FREE Newsletter and receive a four-part video series on how to deadlift!
In continuing with our “Best of 2012″ theme to wrap up the year, today, I’ve got the top EricCressey.com videos of the year.
1. Four Must-Try Mobility Drills - This video was part of an article I had published at Schwarzenegger.com. You can check it out here.
2. Cleaning Up Your Chin-up Technique - It's one of the most popular exercises on the planet, but its technique is commonly butchered. Learn how to avoid the most common mistakes.
3. 8 Ways to Screw Up a Row - Rowing exercises are tremendously valuable for correcting bad posture and preventing injury, but only if they're performed correctly.
4. My Mock/Impromptu Powerlifting Meet - After being away from competitions for a while, I decided to stage my own "mock" powerlifting meet just to see where my progress stood. I wound up totaling elite (1435 at a body weight of 180.6) in about two hours.
5. Cressey Performance Facility Tour - We moved to a new space within our building back in August, and this was the tour I gave just prior to the doors opening.
Those were my top five videos of the year, but there were definitely plenty more you may have missed. Luckily, you can check them out on my YouTube Channel.
I’ll be back tomorrow with another “Best of 2011″ feature.
Sign-up Today for our FREE Newsletter and receive a four-part video series on how to deadlift!
The TRX Y is a fantastic exercise for correcting bad posture and strengthening the muscles surrounding the shoulder girdle. Unfortunately, it's easy to fall into bad traps with technique on this exercise. In today's post, I discuss some of the more common problems we see with the TRX Y - as well as the coaching cues we use to correct them.
The TRX Y is a tremendous addition to your corrective exercise and strength training programs, so be sure to put these coaching cues into action to reap all the benefits of performing this movement.
Here's this week's list of strategies to get your nutrition and strength and conditioning programs headed in the right direction. This is a collaborative effort between Greg Robins and me.
1. Add amplitude to your conditioning.
Let's face it: jogging on the treadmill and riding the elliptical or recumbent bike is about as fun as watching paint dry. While an exercise causing boredom doesn't mandate that it be thrown by the wayside immediately, it does become concerning with this exercise modality doesn't broaden the amplitude - or range of motion - that you encounter in your daily life. Moving better is about improving mobility, which is defined as one's ability to reach a certain posture or position. For some folks, this means actually lengthening short tissues or reducing tension in overly stiff tissues, while for others, it's about establishing stability in the range of motion that one already possesses. Unfortunately, while you're burn some calories on these cardio machines, you aren't going to do much to improve your mobility.
The solution is to implement variety in your conditioning, whether it means taking a bunch of mobility exercises and doing them right after another, or integrating several strength training exercises with lighter loads. Step-ups, sled pushing/dragging, side shuffles, lateral lunges are all ways to get your hips moving in ways they normally don't.
In the upper body, innovative rowing and push-up variations can keep things fun while improving your movement quality.
The next time you're planning to do some interval training on the bike, try substituting some wider-amplitude movements and see how you like it.
2. Get your Vitamin D right.
I've seen studies that have shown great benefits from getting vitamin D levels up to normal, but to my knowledge, those effects were most observed with respect to body composition, hormonal levels, and tissue quality. Interestingly, I just came across this study that showed a significant improvement in power production over four weeks in the vitamin D supplementation group, as compared to the controls. These results are tough to interpret, as the subjects were overweight/obese adults; ideally, we'd study trained athletes with smaller windows of adaptation ahead of them to see just how beneficial vitamin D supplementation is on performance. However, it certainly makes sense that if we're improving body composition, endocrine status, and tissue quality, folks are going to get more out of their training and make faster progress.
Vitamin D is one of very few supplements that I view as "must-haves' for the majority of the population. I'd pair it up with a good fish oil and greens supplement to cover one's nutritional foundation. This is one reason why I'm a big fan of the Athletic Greens Trinity Stack; you can a high quality version of all three in one place.
3. Plan out regressions and progressions.
People like to be good at things. This is especially the case when they are surrounded by a bunch of other people. In the case of group exercise, your attendees are going to have a much better time, get better results, and stay safer if they are performing movements correctly. Group settings aren't ideal from a coaching standpoint, though, as you can't spend as much individualized time coaching technique. Therefore, exercise selection becomes paramount to these classes' success. In other words, you need to have both progressions and regressions in your exercise library.
A common flaw in group classes is that each week, there are 15 new exercise variations on the agenda. The week before, it was 15 other ones, and the following week, it will be 15 more. I know, I know; people want you to "keep it fresh." In my mind, by changing the exercises so often you are taking the easy way out.
Instead, have people become incredible at the basics. Have them squat, swing, push up, row - all basic movements. From there, set up progressions and regressions. This is much easier to do when you keep the original exercises basic.
Here are a few examples:
TRX Supported Squat > Counter Balanced Squat To Box > Goblet Squat > Double KB Front Squat > Offset KB Front Squat
Hands-Elevated Push-up > TRX Chest Press > Push-up > Feet Elevated Push-up > Push-up vs. Band
This is mostly for teaching purposes, as an example. The goblet squat is accessible to most people, and it falls in the middle, with two levels of regression and progression built in.
I'm a big fan of more work up front and easy sailing there out. You might need to take some time to develop your class program, but it will make for a better product and better results thereafter.
4. Use leftover vegetables in your omelet.
I don't know about you, but leftover vegetables never taste quite as good as they do when they've just been cooked. They're cold, and often soggy to the point that even heating them up in the microwave doesn't really make them sound appetizing. Rather than throw them out and skip on your veggies for a meal, try adding them to your omelet the following morning, as the other ingredients - eggs, spices, oils, cheese (if that's your thing), salsa, and ketchup - can help to liven up their taste. I've done this with previously cooked asparagus, broccoli, peppers, onions, spinach, kale, mushrooms, cauliflower, green beans, and tomatoes. Some vegetables - squash and turnip, for instance - don't have the right consistency to make for a good omelet ingredient, though, so experiment carefully!
5. Learn to stand correctly before you even try to train correctly.
Many people think moving well is all about picking the right corrective exercises to get the job done. While that's certainly part of the equation, the truth is that before you even talk about exercising, you have to educate yourself about how to simply stand with good posture. As an example, if you have an excessive anterior pelvic tilt and lordosis, you need to learn how to engage your anterior core, activate your glutes, and prevent your rib cage from flaring up up when you're standing around. Conversely, if you do all your exercises in this aberrant posture, you just get good at sucking!
Have a great week!
Sign-up Today for our FREE Newsletter and receive a four-part video series on how to deadlift!
My "random thoughts" pieces are some of my favorite writings that I've ever published, and today seemed like a good day to throw out some quick and easy ideas on how you can feel better, move better, lose fat, gain muscle, get strong, and - if you're super-motivated - take over the world. Here goes...
1. Get a good training partner.
There are random dudes you meet at the gym who provide a mediocre lift-off on the bench press here and there, and then there are dedicated training partners. There is a big difference. A good training partner will tell you to get your act together and train hard when you're slacking off, or even hold you back when your body is banged up, but you're stupidly trying to push through it. It's guaranteed accountability, motivation, expertise, safety, competition, and all-around awesomeness. To be honest, I often wonder if most people get the best results working with a trainer/strength coach for these factors more than the actual expertise the fitness professional provides!
2. Make your bedroom a cave.
One of the best investments my wife and I made when we bought our new house were reinforced window shades for our bedroom so that very little light could get through when they were down. They make a dramatic difference in terms of how dark you can make your room at night (especially if you have street lights near your residence) and were 100% worth the extra cost, as compared to regular shades.
Even if you don't want to spend the extra few bucks on souped-up shades, though, you can still get some of the benefits of "cave sleeping" by blocking out light from cell phones, alarm clocks, and - if you're a frat boy - bright green neon signs of your favorite beer in your dorm room. Also, do your best to shut the TV and computer off at least thirty minutes before you hit the sack as well, as it'll give your brain time to wind down and transition to some deep, restful sleep.
3. Take Athletic Greens.
I've always been a non-responder to supplements. As an example, I never gained an ounce when I started taking creatine in 2001, and never noticed a huge difference in sleep quality when I started taking ZMA. Still, I pretty much trust in research and go with these supplements, plus mainstays like fish oil and Vitamin D and assume that they're doing their job. It's interesting how some of the most essential supplements we take are the ones where we might notice the most subtle difference, isn't it?
Anyway, in 2011, I added Athletic Greens to this mix. I look at it as whole food based "nutritional insurance" use it in place of my multivitamin. I think it's solid not only as a greens supplement (which, incidentally, doesn't taste like dog crap), but also because it directly improves gut health to improve absorption of micronutrients. With loads of superfoods, herbal extracts, trace elements, antioxidants, and pre- and probiotics, I could tell that it would be something that would decrease inflammation and improve immunity (something I've viewed as increasingly important with each passing year as life has gotten more stressful with the growth of Cressey Performance).
Interestingly, one of our long-time athletes who is now playing baseball at a highly ranked D1 university, started taking Athletic Greens after we chatted about it this summer, and he sent me this note:
Hey Eric, thanks for the recommendation on Athletic Greens. I love the product! I have not gotten sick once since I started taking it 4 months ago, and my body feels better than ever. This is the first semester I haven't gotten sick. Hope all is well!
I guess I'm not the only one who likes it! Check it out for yourself here.
As an aside, they do a pretty cool combination where you can get greens, fish oil, and vitamin D all at once at a great price, and the fish oil is excellent quality. We have several athletes who get everything in this one place for convenience.
4. Go split-stance.
Last week, in my popular post, Are Pull-ups THAT Essential?, I included the following video of forearm wall slides at 135 degrees, a great drill we like to use to train upward rotation, as the arms are directly in the line of pull in the lower traps. With this exercise, we always cue folks "glutes tight, core braced" so that they don't just substitute lumbar extension in place of the scapulae moving into retraction/depression on the rib cage.
Unfortunately, these cues don't work for everyone - particularly those who are super lordotic (huge arch in their lower back). A great "substitute cue" for these folks is to simply go into a split stance, putting one foot out in front of the other (even if it's just slightly). As you have probably observed in performing single-leg exercises like lunges and split-squats, it is much harder to substitute lumbar extension for hip extension than it is with bilateral exercises like squats and deadlifts. Fortunately, the same is true of substituting lumbar extension for scapular movement on the rib cage. So, if you're struggling with the exercise above, simply move one foot out in front of the other and you should be golden.
5. Get some assessments done.
Imagine you were about to embark on a cross country trip with a great vacation in mind in, say, San Diego. However, I didn't tell you where you were starting the journey. While you might get to where you want to be (or at least close to it), it'd make the trip a lot more difficult. You'd probably blow a bunch of money on gas, sleep in some nasty motels in the middle of nowhere, pick up an awkward hitchhiked who smells like cabbage, and maybe even spend a night in a Tijuana jail along the way. Not exactly optimal planning.
A strength and conditioning program isn't much different than this cross-country trip. If you don't know how your body works - both internally and externally - you need to learn before you subject it to serious stress. Get some bloodwork done to see if you have any deficiencies (e.g., Vitamin D, iron, essential fatty acids) that could interfere with your energy levels, ability to recover, or endocrine response to exercise. Likewise, consult someone who understands movement to determine whether you have faulty movement patterns that could predispose you to injury. I think this is one reason why Assess and Correct has been our most popular product ever; it gives folks some guidance on where to start and where to go. Otherwise, the strength and conditioning program in front of you is really just a roadmap, and you don't know where the starting point is.
These are just a few quick thoughts that came to mind today, but I'll surely have many more in the follow-ups to this first installment. Feel free to post some of your own ideas in the comments section below, too!
Sign-up Today for our FREE Newsletter and receive a four-part video series on how to deadlift!
The pull-up is among the most sacred strength exercises in the history of weight training programs, ranking up there with squats, deadlifts, and bench and overhead presses. This is one reason why I expect there to be burning Eric Cressey effigies in various strength and conditioning circles after they read the following sentence:
Some people would be wise to leave out pull-ups - at least temporarily.
Before you rip me a new one, please give me a few minutes to explain.
First off, I get it: pull-ups train the lats, and the lats are huge players in athletic function and the quest to get strong and gain muscle. They're the biggest player in force transfer between the lower and upper body, and play key roles in core stability and breathing. Specific to my baseball work, lat recruitment is higher during acceleration in professional pitchers than amateurs, showing that reliance on this big muscle helps generate increase pitching velocity, too. I actually wrote an entire article back in 2006 about just how extensive the lat's role is, if you'd like to read more: Lats: Not Just for Pulldowns.
However, the "expansive" presence of the lats - running from the thoracolumbar fascia all the way up to the humerus - can make them a problem as much as they are a solution. To that end, here are four reasons you may want take a break from pull-ups/chin-ups/pulldowns in your strength training program:
1. Heavy pull-ups can make the elbows very cranky - This is really the shortest and least complex of my arguments, so I'll get it out of the way early. My personal best three-rep max chin-up is 321 pounds, at a body weight of about 188 pounds (so, the external load was 133 pounds). My best raw three-rep max bench press is about 330 pounds, but what you might find surprising is that going heavy on the bench press is dramatically easier on my joints (particularly my elbows) than pull-ups/chin-ups are. What gives?
First, when you bench press, you're doing a full-body movement. There is leg drive and loads of core stability involved on top of the upper extremity activity that's taking place - so the stress is more easily distributed. When you do a pull-up, your upper extremity is relatively isolated, so the stress is more concentrated.
Second, a pull-up is a traction exercise; it pulls the humeral head out of the socket, and essentially pulls the lower and upper arm apart at the top. When you lose bony congruence - one of the most important, yet overlooked components of joint stability - you have to pick up the slack with the active restraints (muscles/tendons) acting at the joint. Low-level traction can be tremendously helpful in situations like external impingement at the shoulder, or intervertebral disc issues. However, under extreme load, it can be pretty darn stressful to the soft tissue structures around the joint. Conversely, a bench press is an approximation exercise, so you can actually draw some stability from the joint alignment itself to take some of the stress off the soft tissue structures.
I remember Jason Ferruggia writing recently about how heavy chin-ups/pull-ups can really beat up on older lifters - and it's safe to say that the reason isn't so much tissue degeneration, but simply that it took time for them to build appreciable enough strength to get to the point where the overall stress was too much.
2. The lats overpower the lower traps - The overwhelming majority of the baseball athletes I see (and most extension/rotation sport athletes, in general) live in lordotic postures. The lat is a strong extensor of the spine - but it also attaches to the rib cage and scapula on the way to the upper extremity. The end result is that many lordotic athletes wind up with a very "gross" extension pattern.
The rib cage flairs up, and the lower traps do little to pull the shoulder blades back and down on the rib cage - because the lats have already gotten an athlete to the position he/she wants to be in via lumbar extension. You can see from the picture below that the line of pull of the two muscles is actually very comparable - but given cross sectional area and length, the lat will always have the upper hand, especially if it's constantly being prioritized in a strength training program due to exercise selection and faulty lifting technique.
Effectively, we need to learn to move our scapulae on our rib cage, as opposed to just moving our entire spine into extension. Interestingly, you'll find a lot of flexion-bias in the Postural Restoration Institute (PRI) and Dynamic Neuromuscular Stabilization (DNS) schools of thought because they clearly appreciate that getting folks out of "gross extension" is a way to get/keep people healthy. Having ultra short/stiff lats can cause issues ranging from extension-based back pain (e.g., spondylolysis) to shoulder pain (e.g., external or internal impingement). As I've written previously, too, this global dysfunction may also be the reason we're seeing more femoroacetabular impingement in athletes.
As another interesting aside, I see a lot of throwers with low right shoulders and incredibly short/stiff lats on that side.
This is secondary to faulty rib positioning and the scapular anterior tilt that ensues (as per the PRI school of thought), but one additional thing we've found (thanks to great feedback from physical therapist Eric Schoenberg) is that overhead shrugging variations on the low shoulder have helped these throwers to not only feel better, but minimize these asymmetries. Effectively, creating a bit more stiffness in the upper trapezius helps it to counterbalance the aggressive downward pull of the lat on the scapula.
These folks sit in scapular depression, and for that reason, we'll often leave out any exercises (e.g., deadlifts, dumbbell lunges) that involve holding heavy weights in the hand until scapular positioning is better controlled.
3. The humeral attachment portion of the lat is part of a significant zone of convergence at the posterior shoulder - The back of your shoulder is another one of those claustrophobic areas in your body. You've got tendons for the lat, teres major, teres minor, infraspinatus, long head of the triceps, and posterior deltoid all coming together in a very small area, creating friction over each other as their individual forces come together (regions like this are called "Zones of Convergence" by myofascial researcher Luigi Stecco.
The latissimus dorsi is, without a doubt, the largest and strongest of all the involved structures. It also has the longest tendon, which makes it the biggest candidate for nasty tissue quality in the region. The problem is that muscles/tendons don't deform evenly; rather, they move a lot where the tissue quality is good, and very little where it is dense. So, when you're super dense in the posterior shoulder and try to go do pull-ups, as I noted earlier, the entire shoulder girdle wants to move (humeral extension and internal rotation, and scapular depression) together, as opposed to a nice synergy of the humerus with the scapula on the rib cage. When some is stiff in the posterior shoulder and wants to use the lat for everything, a seated cable row looks like this. Notice how the elbow winds up behind the body, and the scapula anterior tilts - and also how old the video is; I look like I am 12 years old and weigh 120 lbs.
Rowing like this over time will eventually irritate the anterior shoulder. However, watch this standing one-arm cable row where the humeral head (ball) maintains a good alignment with the glenoid fossa (socket) as the shoulder blade moves on the rib cage. The humerus doesn't extend unless the scapula moves with it.
4. Overactive lats can decrease the subacromial space - The lat extends, adducts, and internally rotates the humerus. In order to get overhead the right way, we need flexion, abduction, and external rotation of the humerus. So, you can see that it's a direct antagonist to healthy, overhead movement. If you think about your biggest players for pain-free overhead movement, two of them have to be the posterior rotator cuff and lower trapezius. The lat overpowers both of them in a "gross" extension pattern.
Here's a test: position yourself supine, bend the knees, flatten the lower back, and then let your arms hang freely overhead. Then, have someone take a picture looking down at the top of your head. A "pass" would be full shoulder flexion with no arching of the back, and no shoulder pain along the way. A fail would be pain, or something that looks like this:
If your photo looks like this, you better hope that you have outstanding posterior rotator cuff and lower trapezius function (adequate stiffness) to overpower some very short lats if you intend to train overhead pain-free (especially with overhead pressing). Otherwise, your shoulder flexion will really just be lumbar extension and forward head posture substitutions (this one has a nice left rib flair, too).
In other words, you need adequate anterior core stability and good recruitment of the deep neck flexors, too, but those are blogs for another day.
Closing Thoughts
This post has gone on far too long, and to be honest, I've probably just used the last 1300+ words to piss a lot of you off. You'll be happy to know, however, that we still use a ton of pull-ups/chin-ups in our strength training programs at Cressey Performance. In fact, they're a mainstay. Here are some modifying factors, however:
1. The risk:reward ratio gets a little out of whack once you get very strong with pull-ups. You'd be better off adding sets and reps, as opposed to adding load - and you may want to push the heavy stuff less frequently than you would with compound exercises.
2. Get regular manual therapy at the posterior shoulder and entire elbow to stay on top of tissue quality. At the very least, make sure you're foam rolling a ton and using The Stick:
3. Strengthen the anterior core and deep neck flexors so that you don't substitute lumbar hyperextension and forward head posture, respectively, for shoulder flexion.
4. Strengthen the lower traps so that the lats can't overpower them. I like wall slides at 135 degrees abduction, as it allows one to work in the direct line of pull of the lower traps. Make sure to cue "glutes tight, core braced" so that folks can't substitute lumbar extension ("gross extension") for movement of the scapulae on the rib cage. Make sure there is no forward head posture, too.
Prone 1-arm trap raises off the table are also a popular one. Just make sure you continue to cue "glutes tight, core braced, and no forward head posture."
4. Maintain adequate length in the lats. In warm-ups, I like the bench t-spine mobilizations and side-lying internal external rotation as a means of getting some shoulder flexion.
In terms of static stretching, a lat stretch in the power rack is great.
If this gives you an impingement feeling, regress it a bit, stabilize the scapulae with the opposite hand, and gently dip into a wall lat stretch with stabilization.
Many folks will also benefit from this classic overhead stretch in order to reduce stiffness in the long head of the triceps, a synergist to the lats in humeral extension.
5. Make sure you're including plenty of horizontal pulling (rowing) strength exercises as well - and executing them with the correct form. This means moving humerus and scapula together on rib cage, not just yanking the humerus into extension on a fixed scapula.
6. If you have terrible shoulder flexion and can't get overhead without substituting forward head posture and lumbar hyperextension, spend some time addressing the underlying issues before you start cranking on pull-ups. We actually don't do any pull-ups/chin-ups with some of our professional baseball players for 4-8 weeks following the season, as we need to spend time building rotator cuff, lower trap, and anterior core strength. I like to use the back-to-wall shoulder flexion exercise as a "pass/fail test." If you can get the thumbs to the wall without losing the flat-back posture on the wall or bending your elbows, then you can probably start going to pull-ups.
7. Above all else, listen to your body, and hold back if pull-ups/chin-ups hurt.
I'd love to hear your thoughts on this post and your experiences with heavy and/or high-volume pull-ups/chin-ups in the comments section below.
For more information on the role of the lats in upper extremity health and function, I'd encourage you to check out our Optimal Shoulder Performance DVD Set.
Sign-up Today for our FREE Newsletter and receive a four-part video series on how to deadlift!
The dynamic warm-up is an extremely important component of a strength and conditioning program. In addition to reducing the risk of injury while enhancing subsequent performance in a variety of contexts, it's also a great place to implement corrective exercise drills to address underlying muscle imbalances.
With that in mind, to get the most out of your dynamic warm-up, keep in mind these six characteristics of an effective pre-training program.
1. A good dynamic warm-up should be preceded by soft tissue work.
Every one of our clients at Cressey Performance goes through the following foam rolling series (at the very least) prior to their first warm-up drills.
For a bit more on the rationale behind foam rolling, check out this post of mine from a few months ago. Needless to say, it's important - and will make your dynamic warm-up far more productive.
2. A good dynamic warm-up should progress from ground-based to standing.
When I write a warm-up, I want athletes to do all their ground-based activation and mobility drills first, rather than mix them in with standing exercises. This works not only for the sake of convenience, but also in terms of facility logistics: traffic throughout the gym is more predictable. As an example, I might use a wall hip flexor mobilization to improve hip extension range of motion before I'd get an athlete up to do lunge variations in the standing position.
I like to see things progress from ground-based, to standing in-place (e.g., scapular wall slides, bowler squats), to standing and moving.
3. A good dynamic warm-up should progress from single-joint to multi-joint movements.
We might do a rocking ankle mobilization or quadruped extension-rotation early in the warm-up to work purely on ankle mobility and thoracic spine mobility, respectively, but once the warm-up progresses and one becomes upright, all the joints need to be working together in an appropriate balance of mobility and stability. Just count how many different pieces are in place on this drill:
4. A good dynamic warm-up addresses mobility at the ankles, hips, and thoracic spine.
Even if people just worked on these three areas (to the exclusion of everything else) and then moved on to the rest of their strength training programs, the world would be a much healthier and high-performance place. Throw on restrictive footwear and sit hunched over a desk all day, and these are the areas that will suffer the most - so make sure you've got drills for each in the warm-up. Keep in mind that while one drill each for the ankle and thoracic spine mobility will be sufficient for most, it'll likely take several to take care of the hips, as they need to be moved in all three planes of motion.
5. A good dynamic warm-up should take into account joint laxity.
This is something I have to keep in mind all the time, as many of our baseball pitchers have considerable congenital joint laxity. Their joint ranges of motion are already so good that we don't need to do much (if at all) in terms of mobility work. Rather, we do substantially more low-level activation drills during the warm-up period to teach them how to stabilize joints prior to more intense exercise. Conversely, if you have someone who is as tight as a drum, chances are that you can be more aggressive with mobility drills, knowing the subsequent stability will come more easily to them.
6. A good dynamic warm-up should actually increase body temperature.
I see a lot of people who drag their heels going through a warm-up, thinking too much or simply wasting time along the way. You don't need to do 20 different drills, but rather select 8-10 drills and do them at a pace that allows you to get your body temperature and joint range of motion up sufficiently to be prepared for a more specific warm-up (e.g., light deadlifts). If you take it too slowly, it just won't have the same effect. While everyone is different when it comes to perspiration, I like to see athletes sweating a little bit by the end of the warm-up.
These are just a few quick and easy guidelines I like to keep in mind when writing the dynamic warm-ups in our strength and conditioning programs. Of course, each client has unique needs - from actual physical limitations to space/equipment limitations - that one must take into account as well.
To learn more, I'd encourage you to check out Assess and Correct: Breaking Barriers to Unlock Performance. This two-DVD set provides 27 assessments and 78 corrective exercises that can serve as the foundation for effective dynamic warm-ups in your strength and conditioning programs.
Sign-up Today for our FREE Newsletter and receive a four-part video series on how to deadlift!
Earlier this week, I received an email from a reader who was wondering whether deadlifts executed in perfect technique could be all one needs for correcting “bad posture.” It got me to thinking about just how ideal the deadlift really is. Working from the ground up: 1.You’re teaching folks to keep their weight back on their heels, and (ideally) executing the lift in minimalist or no footwear – thereby increasing dorsiflexion range-of-motion. 2. You increase stiffness in the hamstrings and glutes, which extend the hip and posteriorly tilt the pelvis.
3. You get a great co-contraction of all the muscles of the core to effectively handle all shear and compressive forces on the spine. In the process, you lock the rib cage to the pelvis and establish a solid zone of apposition (learn more here) for the diaphragm to function optimally. 4. You establish stiffness in the thoracic erectors, thereby minimizing a thoracic kyphosis. As I noted a few weeks ago, stiffness can be a great thing. 5. You pull the scapulae into retraction and depression, thereby increasing stiffness in the lower trapezius. 6. You pack the neck, ingraining the ideal cervical posture.
It’s no surprise that the deadlift is an outstanding strength exercise when it comes to correcting bad posture. However, is it enough? I don’t think so. Why? Well, first, you have to remember that postural considerations must be multiplanar. Just because we’re moving in the right direction in a bilateral, sagittal plane motion doesn’t mean that we’re ironing out issues in the frontal and transverse planes. Is there adequate control of femoral internal rotation and adduction by the hip external rotators/abductors? Do you see a big rib flair on the left side and a low shoulder on the right? Does an individual have adequate thoracic rotation to match up with the thoracic extension that’s been improved?
We really never work in a single plane during functional activities; life is a combination of many movements. Bad posture – to me at least – isn’t just characterized by how someone stands in the anatomical position, but how he or she is gets into specific positions. In other words, “posture” isn’t much different than “mobility.” Very simply, these terms imply stability within a given range-of-motion. Second, consider the law of repetitive motion, where “I” is injury to the tissues, “N” is the number of repetitions, “F” is the force of each repetition as a percentage of maximal strength, “A” is the amplitude (range of motion) of each repetition, and “R” is rest. To reduce injury to tissues (which negative postural adaptations can be considered), you have to work on each of the five factors in this equation.
You perform soft tissue work – whether it’s foam rolling or targeted manual therapy – on the excessively short or stiff tissues (I). You reduce the number of repetitions (length of time in poor posture: R), and in certain cases, you may work to strengthen an injured tissue (reduce F). You incorporate mobility drills (increase A) and avoid bad postures (increase R). Deadlifts certainly work in some of these capacities, but to say that they alone are enough overlooks the fact that adequate “abstinence” from poor postures is essential to making things work. To easily appreciate this, just ask: “Which is easier to address, an anterior pelvic tilt or a thoracic kyphosis?” The answer is unquestionably “thoracic kyphosis.” Why? It’s a lot easier to adjust your upper extremity posture than it to change the way your pelvis is positioned during weight-bearing. Every step re-ingrains faulty posture and “cancels out” your deadlifts unless you’re really careful. At the end of the day, deadlifts are arguably the single-most effective out there for correcting bad posture. However, in isolation, they simply aren’t enough, as you need everything from multiplanar mobilizations and strength exercises, to manual therapy, to breathing drills in combination with avoidance of bad posture during your daily life. These additions take “effective” and make it “optimal.”
If you've read much of my stuff, you've probably come to realize that I'm quite the shoulder geek. With that title comes a lot of questions at seminars and via email, and one of the more common ones is whether I think direct rotator cuff strengthening exercises are necessary for everyone. A lot of coaches say that they aren't essential, but I beg to differ for five reasons. Here's why:
1. Bad Posture - Nowadays, pretty much everyone has rounded shoulders - which means that the scapulae are winged out. When a shoulder blade isn't sitting right, the rotator cuff muscles that attach to that scapula are at a mechanical disadvantage because they are outside of their ideal length-tension relationship for creating force; it's analogous to trying to shoot a cannon from a canoe.
Incorporating some direct rotator cuff exercises not only strengthens muscles that you know will be operating at a mechanical disadvantage, but also educates a lifter about how the scapula should be positioned for ideal shoulder function.
2. Shoulder impingement is a physiological norm. - Research from Flatow et al. demonstrated that everyone – regardless of age, activity level, sport of choice, acromion type, gender, you name it – has direct impingement on their rotator cuff tendons. If you know a region is going to get beaten up regardless of what you do in your life, why wouldn't you opt to strengthen it proactively?
3. Rotator cuff tears are far more common than you think. - In consideration of the previous point, it should be no surprise that rotator cuff tears are actually far more common than one might realize - even if you look at asymptomatic subjects. Connor et al.discovered that on MRI, 40% of asymptomatic tennis/baseball players had evidence of partial or full-thickness cuff tears. The general population is no different; Sher et al. took MRIs of 96 asymptomatic subjects, finding rotator cuff tears in 34% of cases, and 54% of those older than 60. And these studies don't even include the ones who are actually in pain! It makes sense to strengthen these areas proactively - even if your shoulder doesn't hurt...yet.
4. Lots of people also have labral tears. - In the past, I've written quite a bit about Active vs. Passive Restraints. In the shoulder, the rotator cuff would be considered an active restraint, as it's something that can be strengthened to improve dynamic stability. The labrum, on the other hand, doesn't get stronger with exercise; it's a passive restraint that provides stability. So, if the labrum is torn or frayed (as it very commonly is in both lifters and overhead throwing athletes), then the active restraints - the rotator cuff tendons - need to pick up the slack.
5. The "Just do normal stuff and the rotator cuff will take care of itself" philosophy isn't working. - That's been tried for quite some time, and nowadays, as a society, we move like absolute crap and - as noted above - have a boatload of issues on MRI even if we're asymptomatic. With respect to the cuff, we've built the deltoids up to the point that they absolutely overwhelm the rotator cuff (particularly the supraspinatus), which is trying to prevent the humeral head from migrating upward into the acromion.
A New Paradigm for Performance Testing - This two-part feature was actually an interview with Bioletic founder, Dr. Rick Cohen. In it, we discuss the importance of testing athletes for deficiencies and strategically correcting them. We've begun to use Bioletics more and more with our athletes, and I highly recommend their thorough and forward thinking services.
A New Paradigm for Performance Testing: Part 1A New Paradigm for Performance Testing: Part 2
I already have a few series planned for 2011, so keep an eye out for them! In the meantime, we have two more "Best of 2010" features in store before Friday at midnight.
Sign-up Today for our FREE Newsletter: